Here are 34 DIY Scrapbook Paper Crafts & Creative to turn them into awesome works of art. Some of the scrapbooks have a small design that can be cut out and used for card making. These paper crafts are perfect for using leftover sheets and scraps. These crafts are so simple and fun making projects as you’ll love to do these creative ideas. These paper crafts ideas are so amazing to do with your friends. There are a lot of ideas to do with these scrapbook paper crafts to show your creativity.
What things you can make from scrapbook paper crafts? There are many crafts ideas, from home decor to gifts and many more. There are so many DIY budget-friendly projects to make with your friends, family, and kids. Make a DIY magnet with these scrapbook papers and decoupage medium, that’s are so easy to make and a great gift idea. These beautiful DIY wall art with scrapbook paper and cut pieces of wood, that are so simple, easy, and great on the mantel. You can use these scrapbook papers in kitchen tools like decorating a serving tray, wooden spoon, and many more. You can make fantastic jewellery for yourself and as a gift, from these scrapbook papers. These scrapbook papers can be used for all sorts of crafts like book covers, gift boxes, and many more. You can get more creative with this scrapbook paper by letting your imagination run wild. You can use scrapbook paper to decorate your house, and you can also make envelopes for many occasions. Below are the various ideas for using scrapbook paper that you can easily make.
1. DIY Geometric Bowls
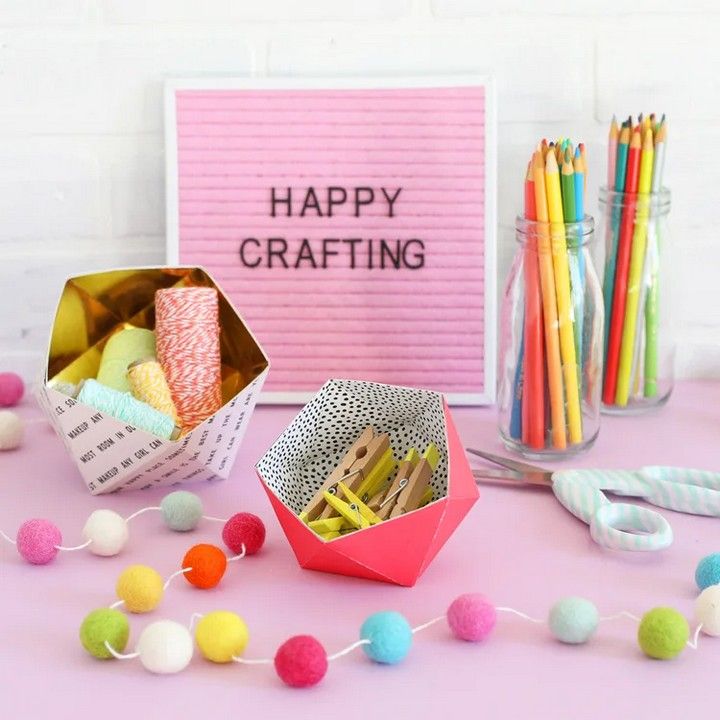
The method entails moulding the chosen material into a geometric bowl shape. For example, using clay or polymer clay, you would use your hands or tools to mould and shape the material into the desired geometric shape, such as triangles, hexagons, or squares. If you’re working with wood, you may need to cut and assemble pieces to create the geometric shape. Paper and glue are layered around a mould or form to create the desired shape in papier-mâché. Tutorial
2. Vintage Map Letter with Scrapbook Paper
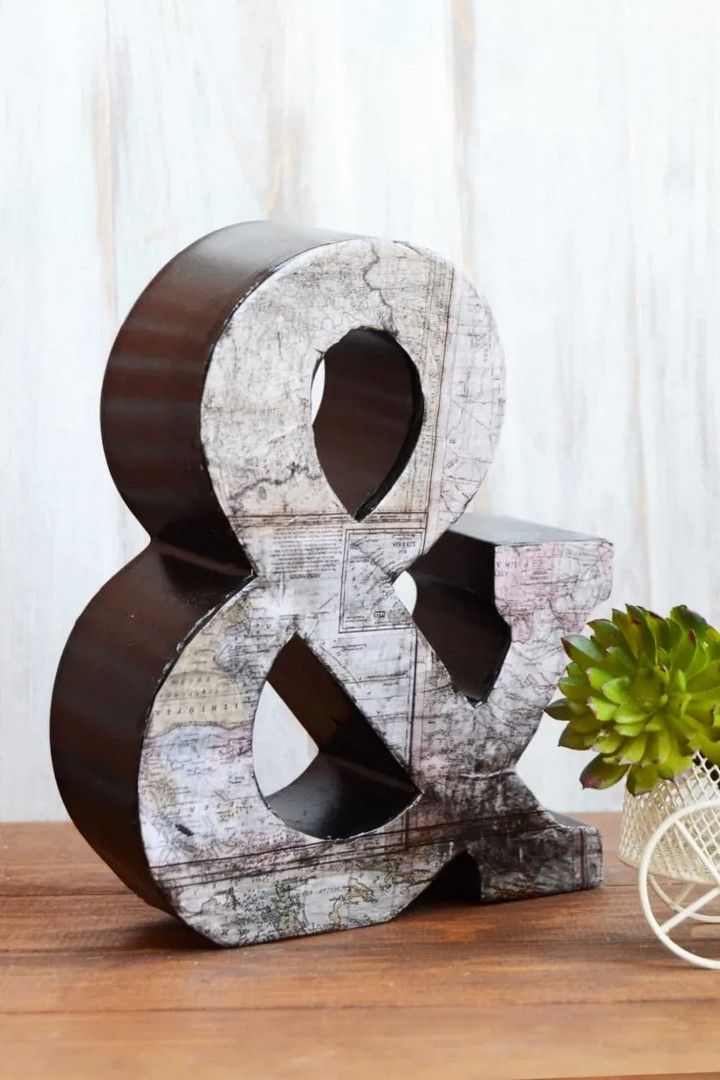
A vintage map letter with scrapbook paper is a do-it-yourself activity in which you make colourful letters out of old maps and scrapbook paper. Selecting a letter template, tracing it onto the historical map, then cutting it out is the procedure. Then, cut smaller scrapbook paper pieces and paste them to the letter to create a collage appearance. As a consequence, you have a unique and nostalgic piece of décor. Tutorial
3. Patchwork Stool with Pretty Paper
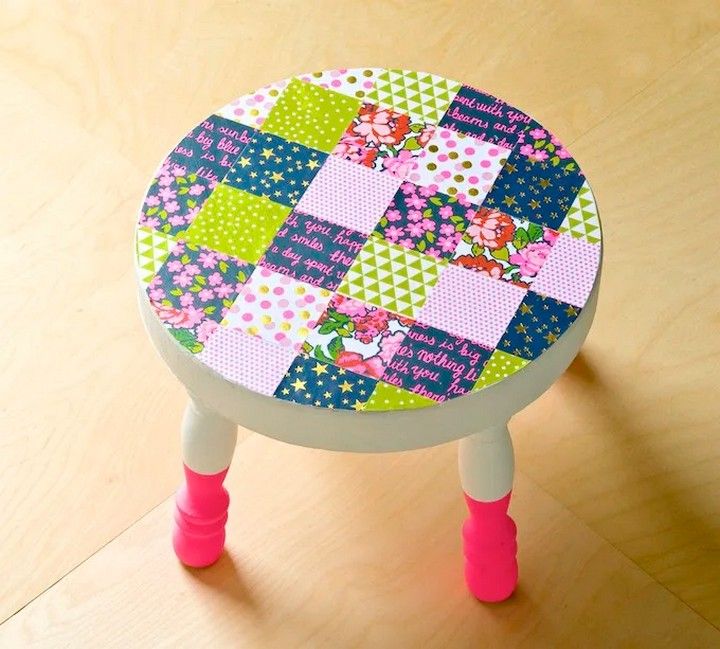
A patchwork stool with gorgeous paper is a do-it-yourself project in which you cover a simple stool with decorative paper in a patchwork pattern. The lovely paper is cut into various shapes and sizes before being adhered to the surface of the stool using glue. The paper patchwork design adds colour, pattern, and visual appeal to the stool, making it a one-of-a-kind and eye-catching piece of furniture. Tutorial
4. Notebooks with Scrapbook Paper
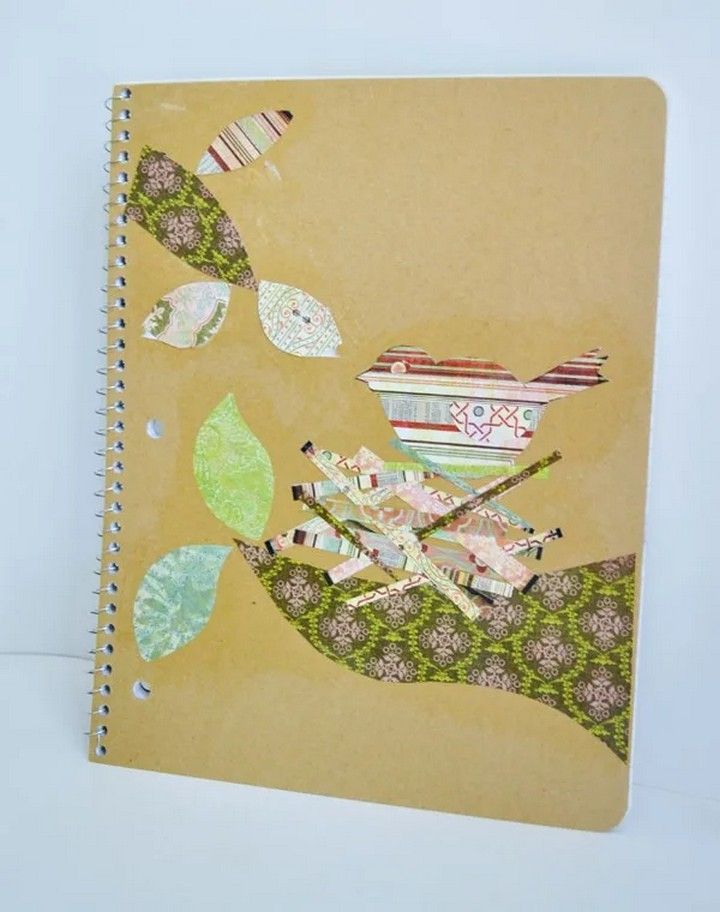
Scrapbook paper notebooks are made through a DIY project in which scrapbook paper is used to embellish the covers of simple notebooks. The scrapbook paper is measured and cut to suit the measurements of the notebook covers during the procedure. Then, using adhesive on the reverse of the paper, gently glue it to the front and back pages of the notebook, producing a colourful and personalised pattern. This gives your notebooks a personal and creative touch. Tutorial
5. Decoupage Wooden Spoons
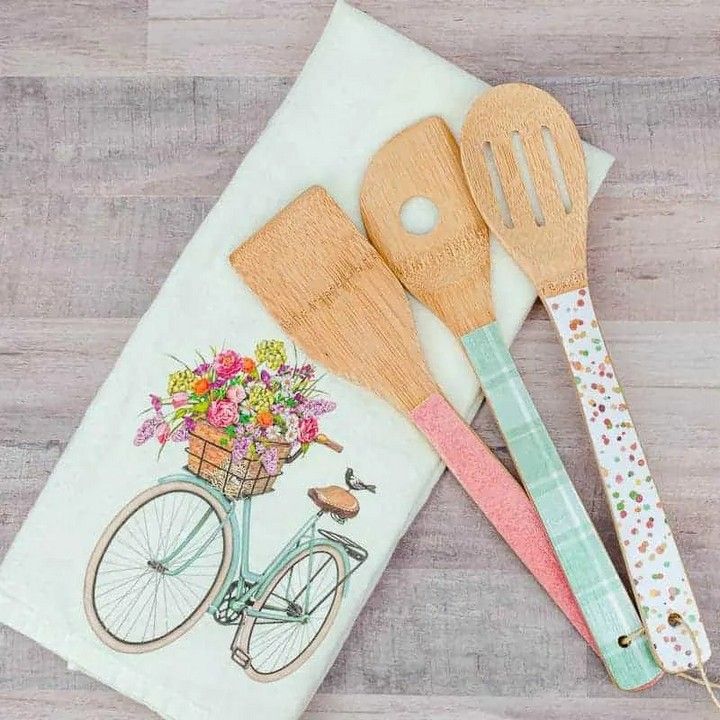
Decoupage wooden spoons are made by adhering ornamental paper or fabric to the surface of wooden spoons with decoupage glue or a decoupage solution. Typically, the procedure begins with picking the ideal paper or fabric with the required patterns or motifs. The wooden spoons are then cleaned and prepared by lightly sanding them to achieve a smooth surface. Tutorial
6. Dixie Cup String Lights
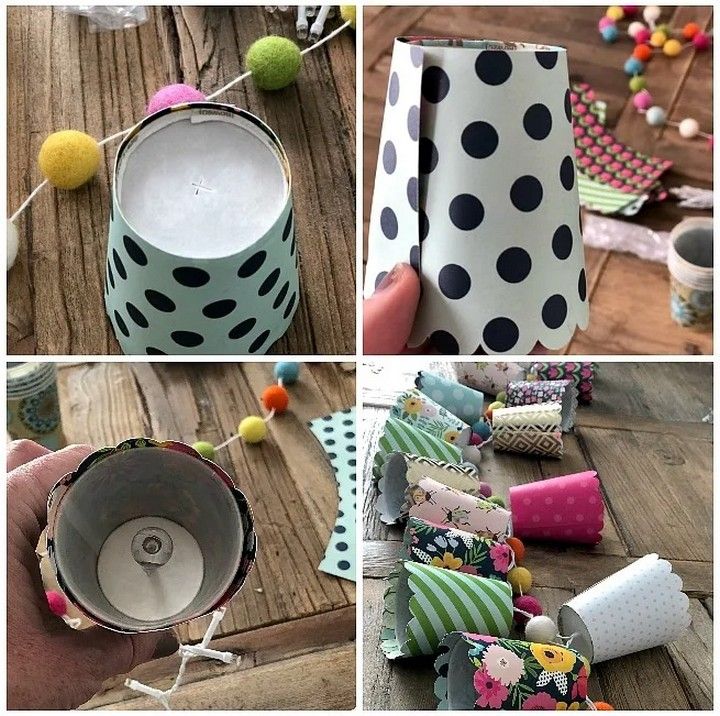
Dixie cup string lights are a creative idea that transforms Dixie cups (disposable paper cups) into attractive light covers for string lights. Poking holes in the bottoms of the cups, threading the cups onto a string of lights, and fastening them in place are usual steps. When lit, the cups provide a delightful and whimsical glow, making them a unique and festive lighting solution for parties or celebrations. Tutorial
7. DIY Photo Mat with Scrapbook Paper
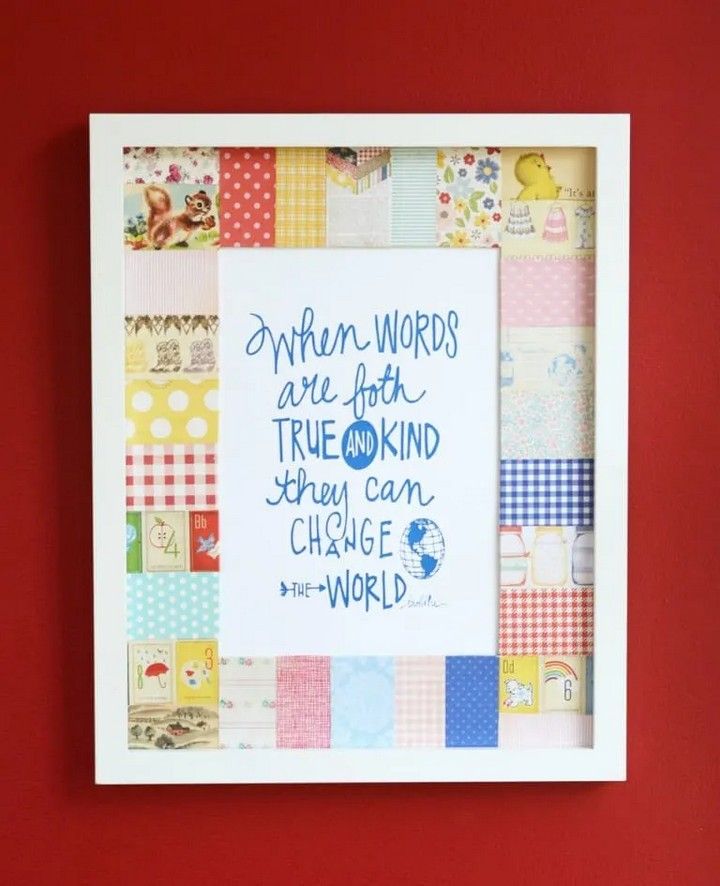
A DIY picture mat with scrapbook paper is a project in which you use scrapbook paper to make a beautiful border for your images. Choosing scrapbook paper with patterns or motifs that compliment your images is the first step in the process. The paper is then measured and cut to the required size to fit around your photo. Finally, you apply the photo mat to your photograph, framing it with a unique and personal touch. Tutorial
8. Dollar Tree Wall Art
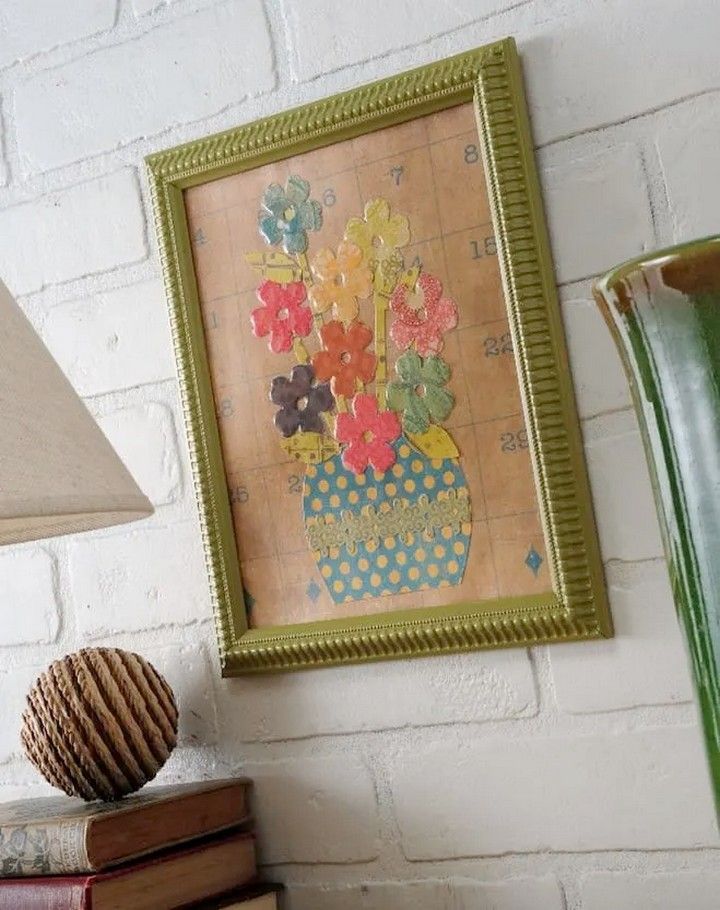
Dollar Tree wall art is the production of inexpensive and imaginative artwork utilising materials or resources from the Dollar Tree shop, a bargain retail brand. This DIY project entails perusing the store’s assortment of frames, canvases, craft tools, and even ornamental elements. By mixing and reusing these inexpensive materials, you can create one-of-a-kind and cost-effective wall art to beautify your house or space. Tutorial
9. DIY Closet Dividers for Nursery or Kids’ Room
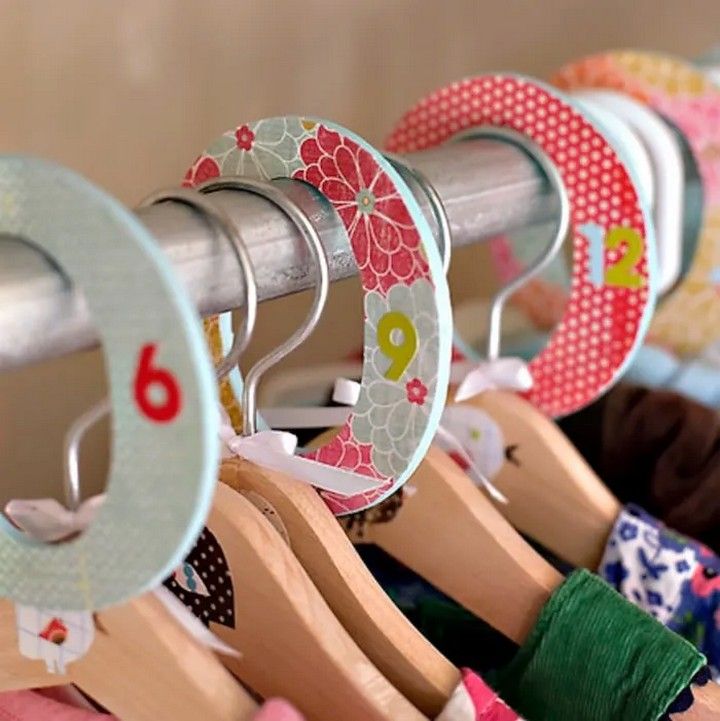
DIY closet dividers for a nursery or kids’ room are made to aid in the organisation and categorization of clothes sizes or categories within a child’s closet. Making little separators to put on the closet rod and separate distinct areas is the goal of this project. Materials such as cardboard, foam board, and even wooden discs can be used. Decorate them with labels or graphics to make it easier to identify and organise clothes items. Tutorial
10. DIY Scrapbook Paper Art
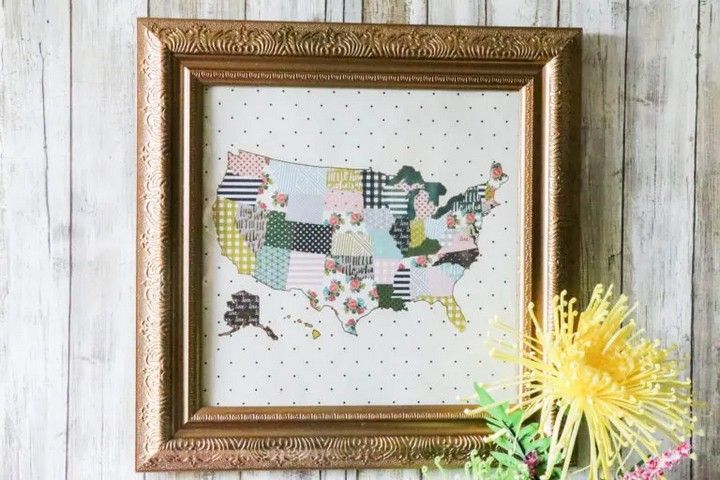
DIY scrapbook paper art is the use of scrapbook paper to produce one-of-a-kind and creative items. Selecting scrapbook paper with varied patterns and colours, cutting or ripping it into desired shapes or sizes, and arranging and attaching the paper onto a canvas, wooden panel, or other surfaces are all part of this activity. The end product is a visually pleasing piece of art that highlights the beauty and adaptability of scrapbook paper. Tutorial
11. Scrapbook Paper Envelopes
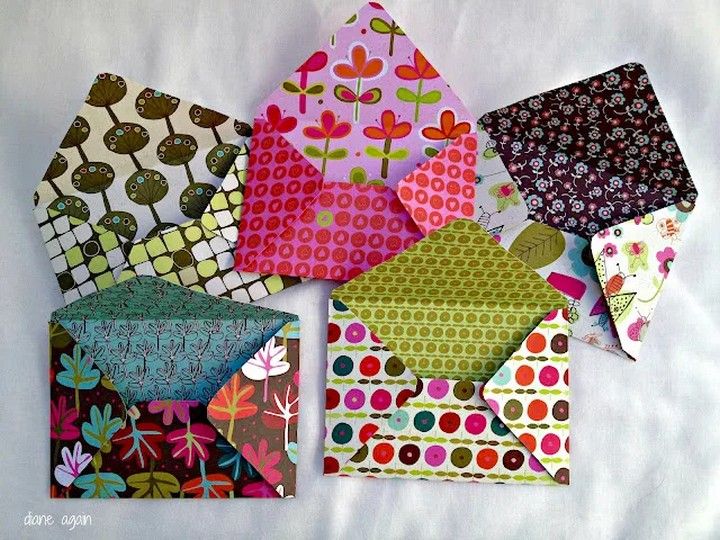
Scrapbook paper envelopes are constructed by hand from attractive scrapbook paper. Choosing scrapbook paper with appealing patterns or motifs, measuring and cutting it to the proper size for the envelope, and folding and glueing the paper to make the envelope shape are all part of this DIY craft. Scrapbook paper envelopes may be used for special occasion cards, gift cards, or holding small goods, giving your letter a personalised and creative touch. Tutorial
12. Decorate Your Own Photo Frame
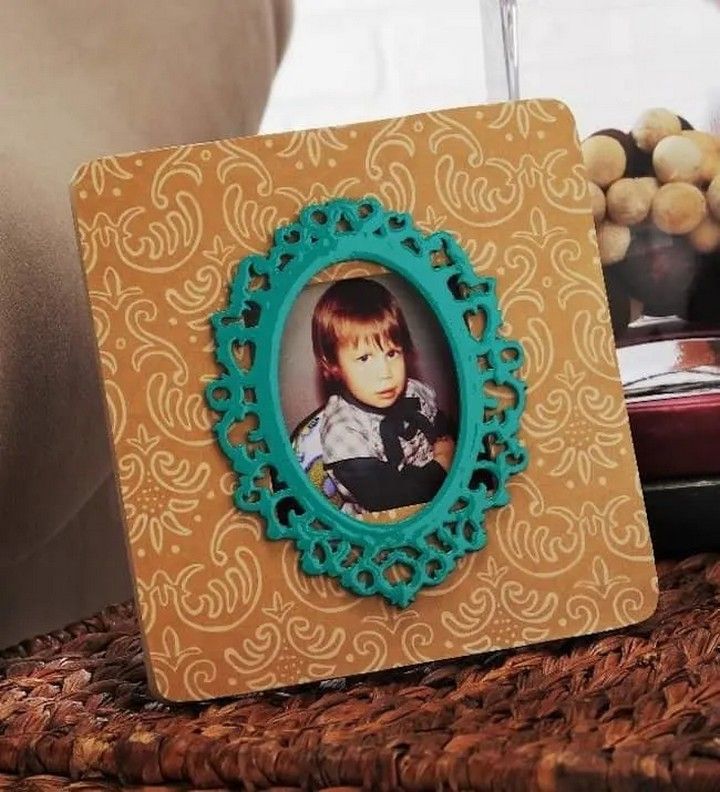
To begin decorating your own photo frame, begin with a basic frame made of wood, plastic, or any other material of your choosing. Collect decorative items like paint, markers, stickers, glitter, beads, or ribbons. Paint, sketch, or adorn the frame with the specified ornaments using your imagination. Allow it to dry before inserting your favourite photo and displaying your personalised photo frame as a one-of-a-kind piece of décor. Tutorial
13. Decorate a Wood Crate
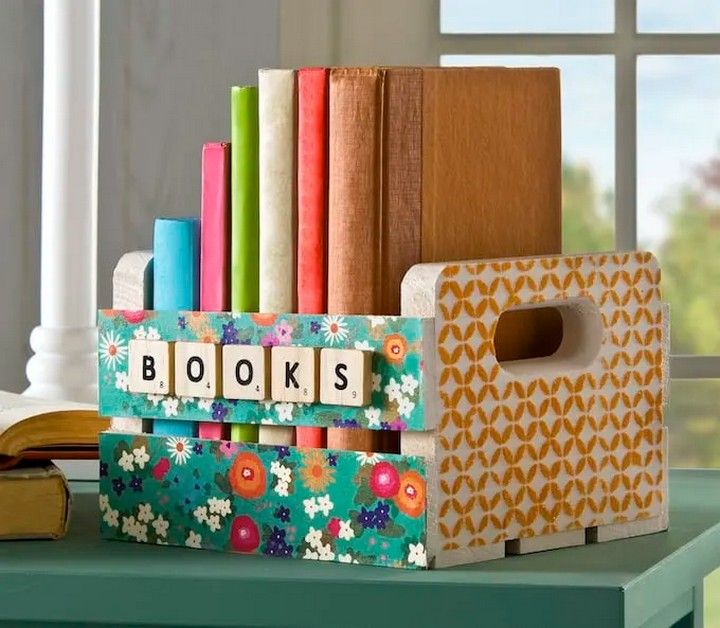
Decorating a wood box is a creative and entertaining DIY project. Begin with a basic wood box and gather supplies like paint, stencils, washi tape, decoupage paper, or fabric. You may paint the crate in your favourite colours, use stencils or washi tape to add patterns or designs, or decoupage it with ornamental paper or fabric. As a consequence, you’ll have a unique and elegant storage or display option for your house. Tutorial
14. Side Table Drawer Liners
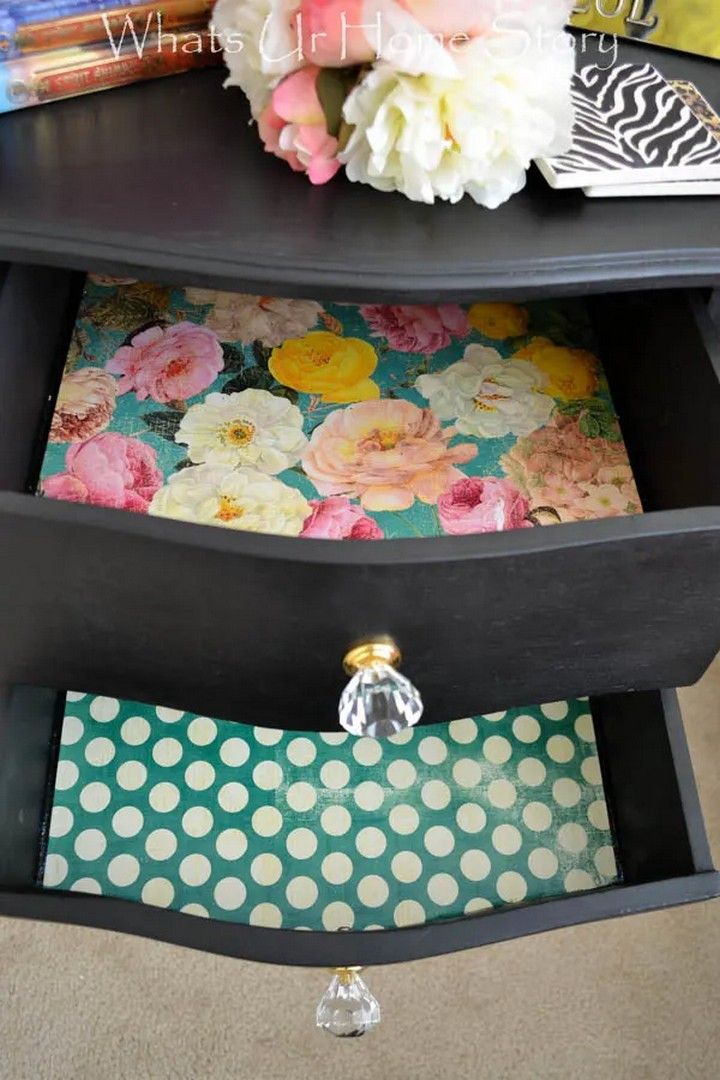
Side table drawer liners protect the interior of the drawers from scratches, grime, and damage while also adding a decorative touch. To make drawer liners for a side table, first measure the drawer measurements and cut a liner material like contact paper, cloth, or ornamental paper to suit. Apply the liner to the bottom of the drawer, making sure it is smooth and wrinkle-free. This helps to organise the drawers and provides a personal touch to your side table. Tutorial
15. Dress Art on a Budget with Mod Podge
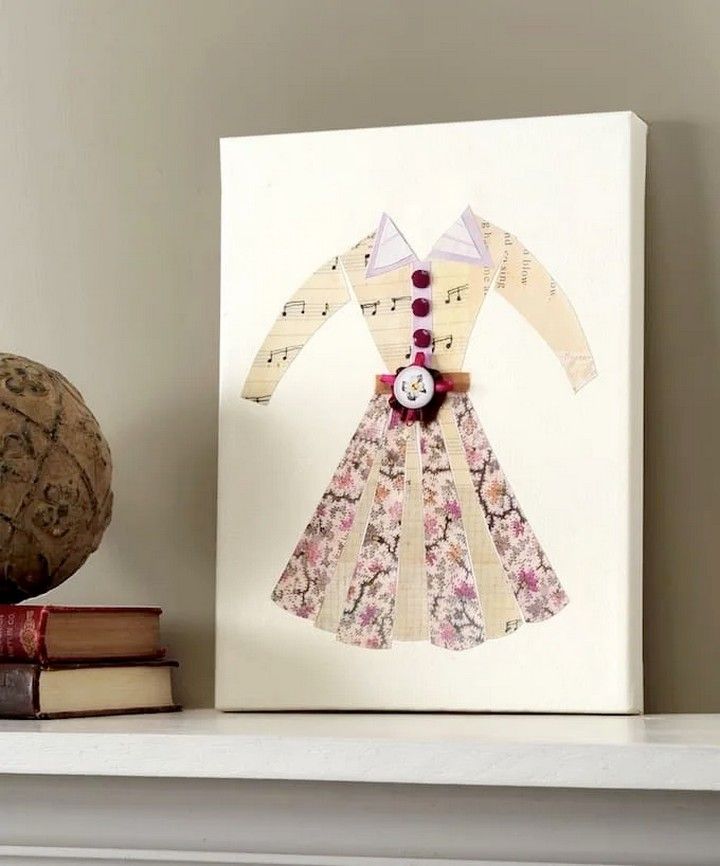
Using Mod Podge to make clothing art on a budget is a creative and cost-effective activity. Begin with a blank canvas or wood panel and collect photos of dresses from magazines, printed pictures, or fabric scraps. Cut out the dress forms and glue them to the surface with Mod Podge. For a glossy finish, apply a coat of Mod Podge on the dresses. The ultimate product is a one-of-a-kind and reasonably priced piece of dress-inspired artwork. Tutorial
16. IKEA Wall Mirror in Four Steps
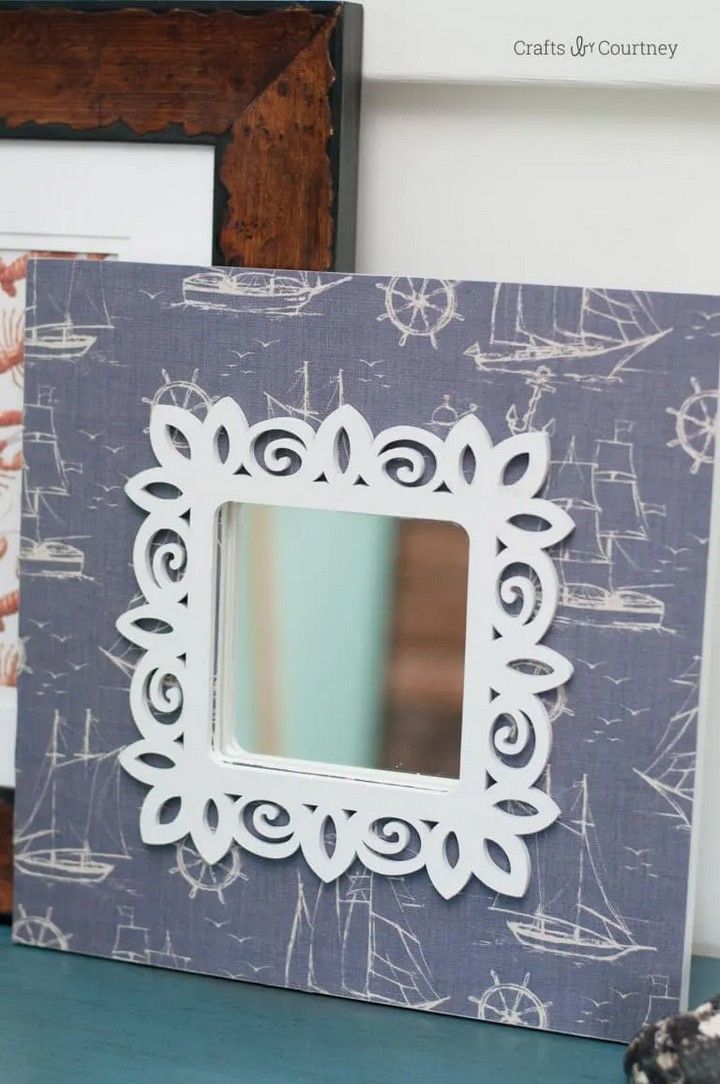
An IKEA wall mirror is both stylish and useful, and it may improve the look of any space. These mirrors, which come in a variety of forms, sizes, and designs, may be easily mounted on walls with the included hardware or extra attachments. IKEA wall mirrors are made with durability and quality in mind, making them an affordable way to add flair and usefulness to your living area. Tutorial
17. Decorate a Tray Using a Goodwill Find
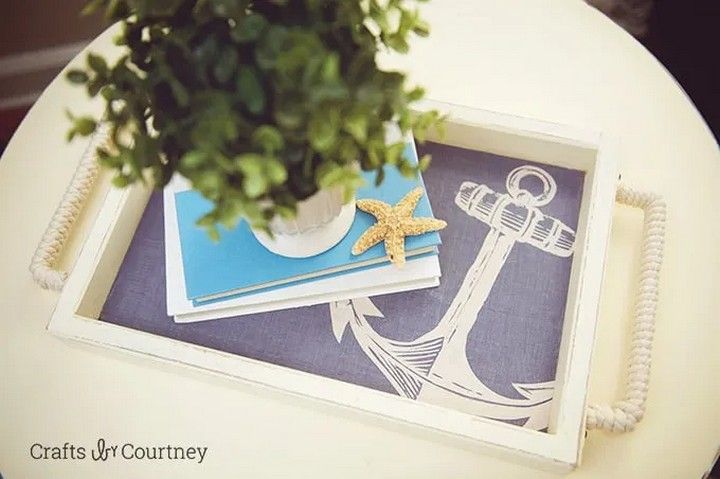
To design a tray with a Goodwill find, first choose a tray from a Goodwill store or other resale store. For a new look, carefully clean the tray and consider sanding or painting it. Gather items such as ornamental paper, cloth, or paint next. To create a personalised and one-of-a-kind design, adhere the chosen material to the tray’s surface using glue, decoupage methods, or painting. Tutorial
18. Medicine Cabinet Redo with Scrap Paper
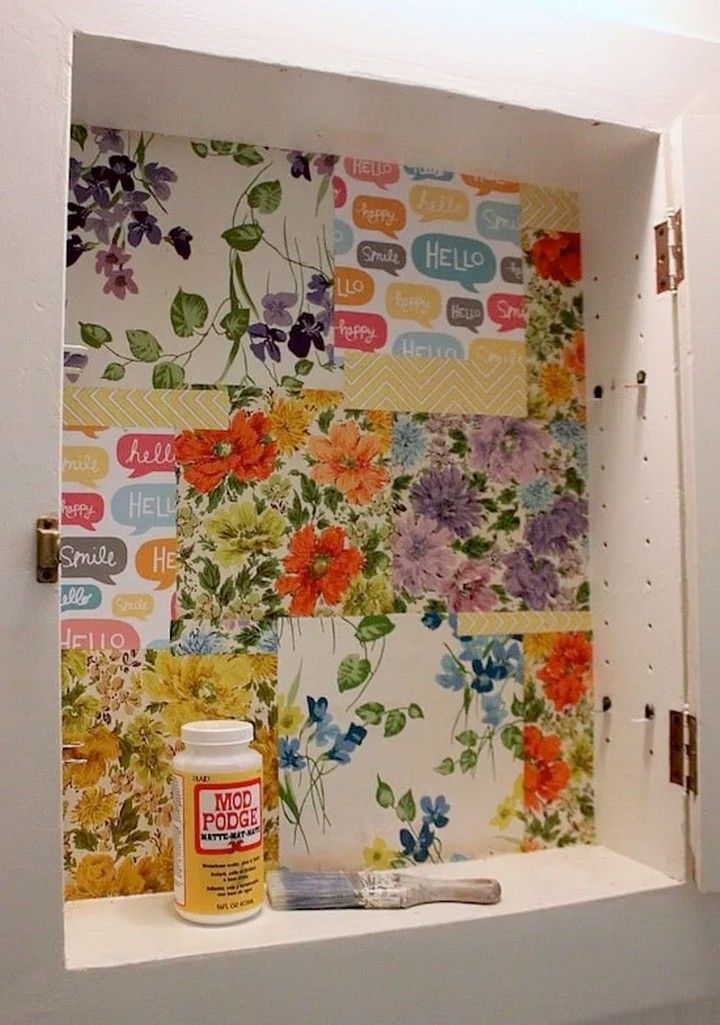
Remove the cabinet doors and wipe the surface before redoing a medicine cabinet with scrap paper. Make scrap paper pieces to fit the cabinet doors. Apply a decoupage medium to the back of the paper and spread it onto the doors, smoothing out any creases or bubbles as you go. Allow it to dry before adding further coatings of decoupage medium for durability. Replace the doors to create a new and personalised medicine cabinet. Tutorial
19. Decorate a Shelf with Scrapbook Paper
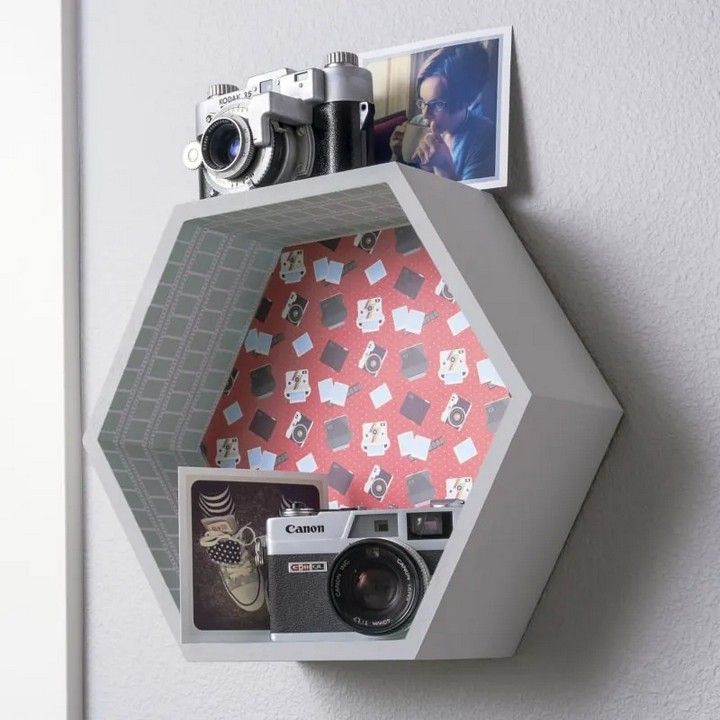
To decorate a shelf using scrapbook paper, first measure the rear panel of the shelf. Cut scrapbook paper to those dimensions. Apply a small coating of glue or decoupage medium on the rear panel and smooth out any creases or bubbles before pressing the paper onto it. Allow it to dry, and your shelf will have a new and colourful scrapbook paper backdrop. Tutorial
20. Cute DIY Pencil Holder from a Jar
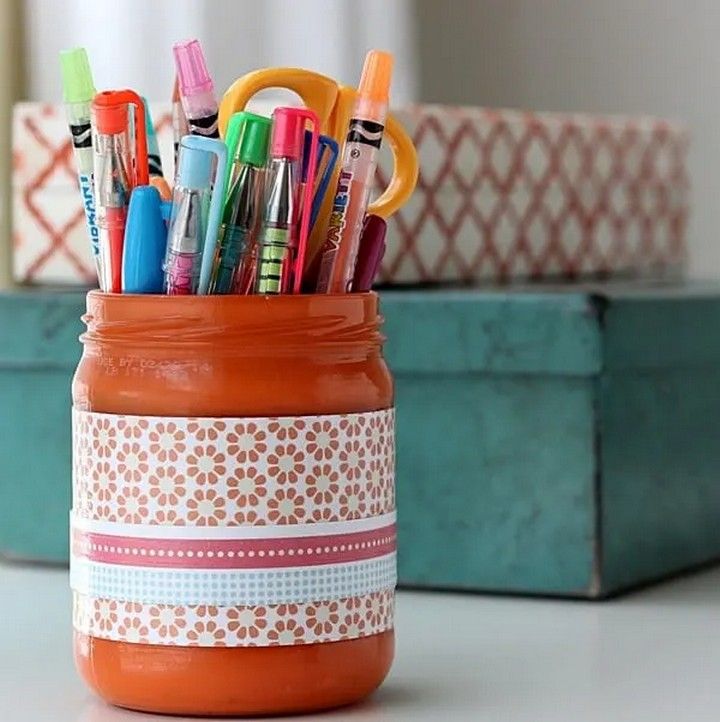
Repurpose a glass jar, such as a mason jar or a jam jar, to make a lovely DIY pencil holder. Begin by washing the jar and removing any labels. Then, using paint, washi tape, stickers, or any other decorative materials, adorn the jar. Ribbons and buttons can also be used as embellishments. When painted, the jar transforms into an attractive and functional pencil holder for your desk or workstation. Tutorial
21. DIY Alphabet Blocks for Nursery Decor
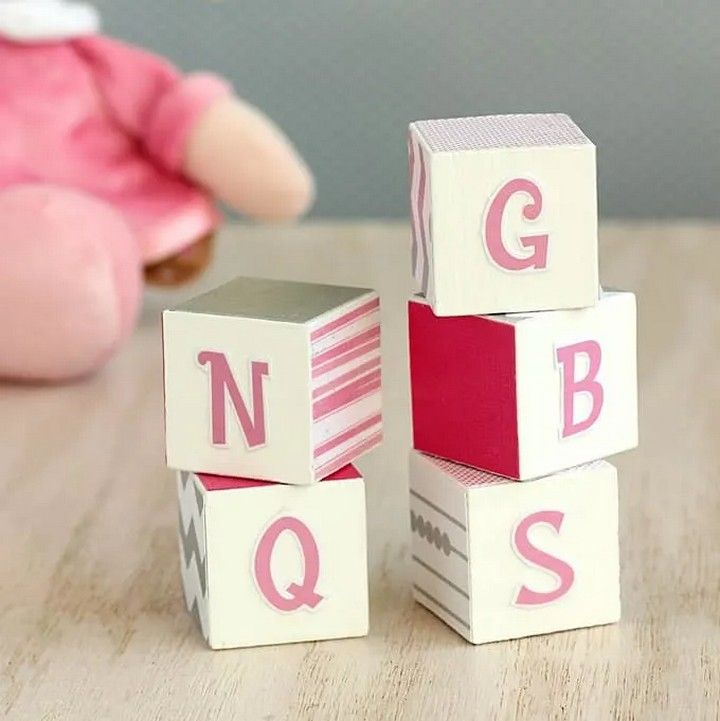
Gather wooden blocks and craft items to make DIY letter blocks for nursery décor. Paint the blocks in different colours or cover each side with a different alphabet letter using scrapbook paper. You may also use stickers, stencils, or hand-painted motifs as ornamental accents. Arrange the blocks on shelves or stack them to spell out words for a personalised and informative nursery addition. Tutorial
22. DIY Scrapbook Embellishments
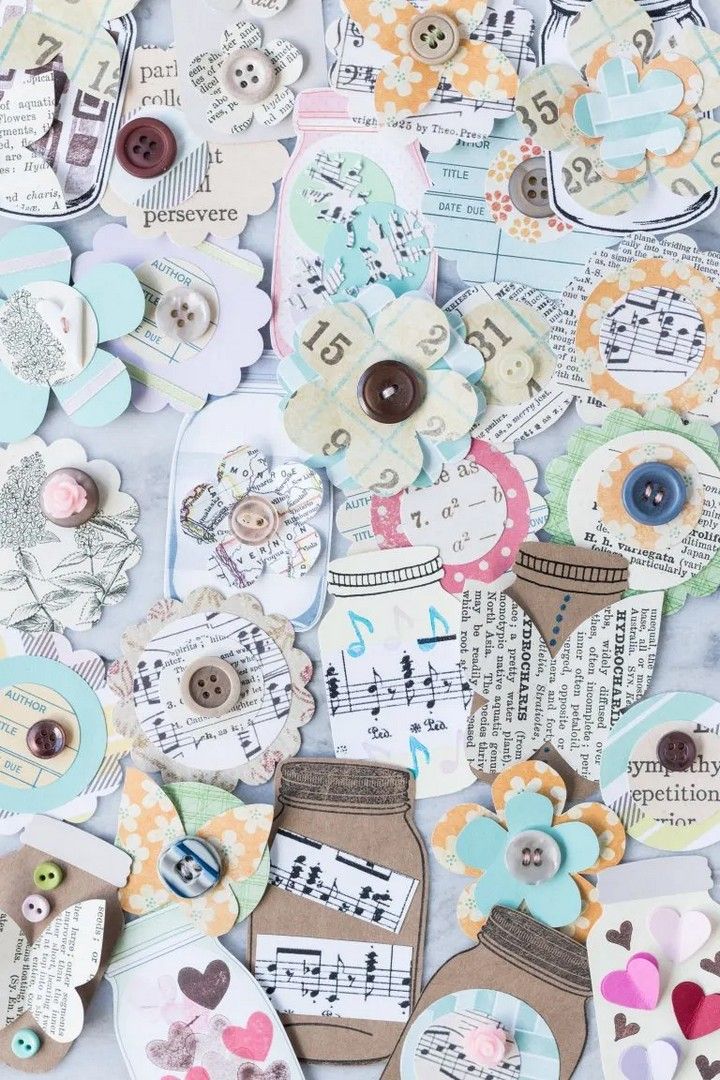
Repurpose items and use innovative approaches to make DIY scrapbook decorations. To make personalised decorations, cut shapes from printed paper, cloth, or felt. To add designs and details, use stamps, ink, or markers. Fold or layer paper or cloth to make dimensional pieces. Decorate with buttons, ribbons, or sequins. These handcrafted decorations give your scrapbook layouts or other paper crafts a personal and one-of-a-kind touch. Tutorial
23. DIY Clip Frames in Four Simple Steps
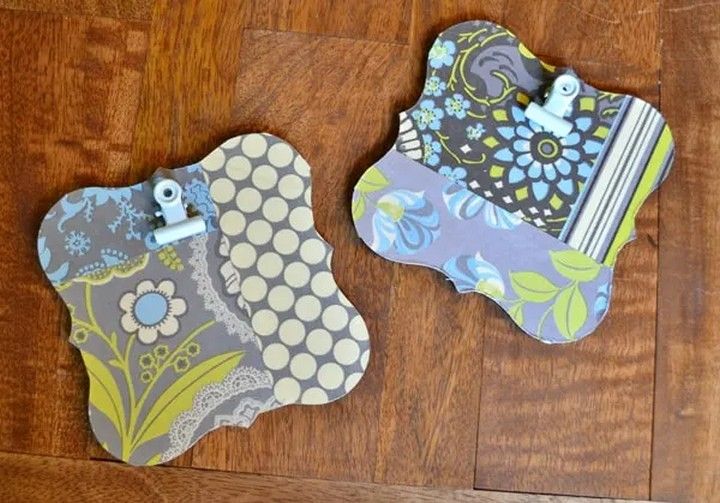
Make your own clip frames with simple materials. Begin by making a backing out of wood or cardboard. Using glue or tiny screws, attach small clips or bulldog clips along the corners of the backing. Paint, washi tape, or scrapbook paper can be used to decorate the backside. Insert your artwork, pictures, or prints into the clip frames and hang or display them to highlight your favourite items. Tutorial
24. Bangle Bracelets
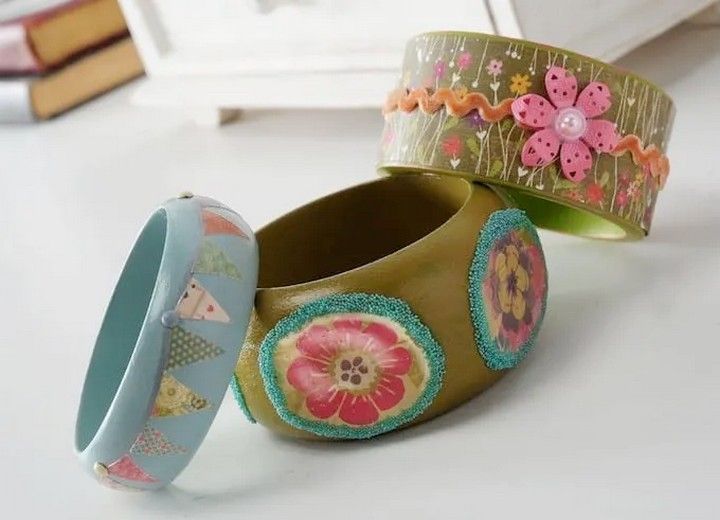
Bangle bracelets are a style of jewellery that is distinguished by its stiff circular shape. They can be built of a variety of materials, including metal, wood, and plastic. You may make DIY bangle bracelets by starting with wire or metal blanks and then adding beads, charms, or other embellishments. To make one-of-a-kind and personalised bangle bracelets, shape the wire or connect the beads to the metal blanks. Tutorial
25. Scrapbook Paper Twist Ties
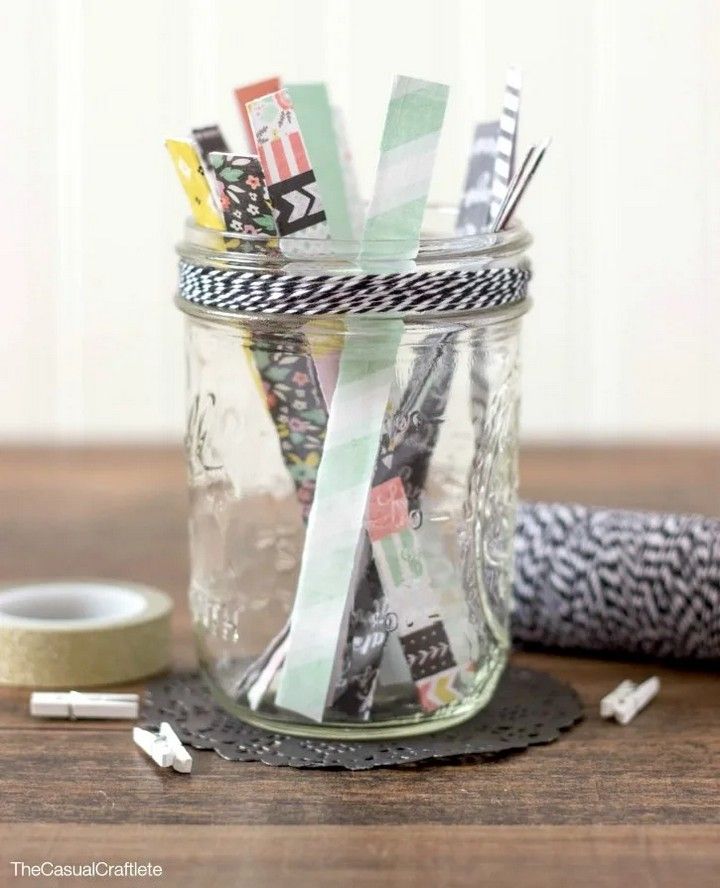
For a fun and beautiful touch, make twist ties out of scrapbook paper. Cut scrapbook paper strips about 1 inch wide and 6-8 inches long. Fold each strip lengthwise in half and twist the ends together to make a knot. Twist ties can be used to fasten gift bags, organise wires, or provide a decorative touch to packaged gifts. They are adaptable and may be tailored to any theme or occasion. Tutorial
26. Easy DIY Travel Mug on a Budget
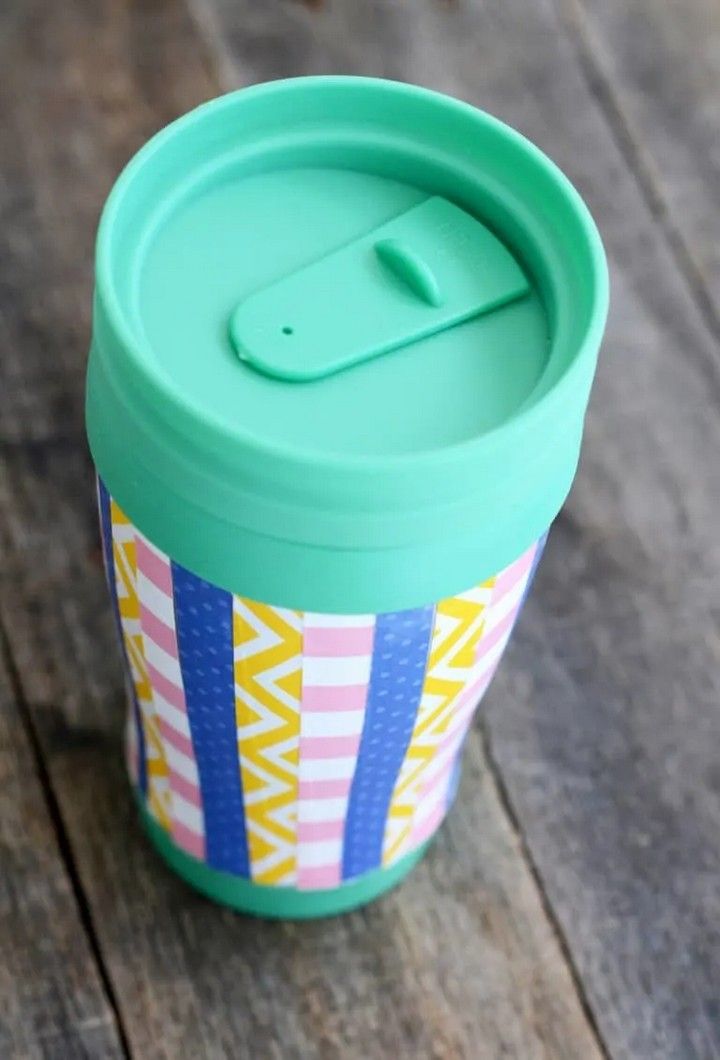
Begin with a simple, affordable travel mug to make an easy DIY travel mug on a budget. Decorate it using materials of your choice, such as sticky vinyl, stickers, or permanent markers. Customise the mug with your name, favourite patterns, or motivational messages. Make certain that any materials utilised are both food-safe and washable. This low-cost project lets you to create a personalised and one-of-a-kind travel mug without breaking the wallet. Tutorial
27. Colorful End Table Makeover
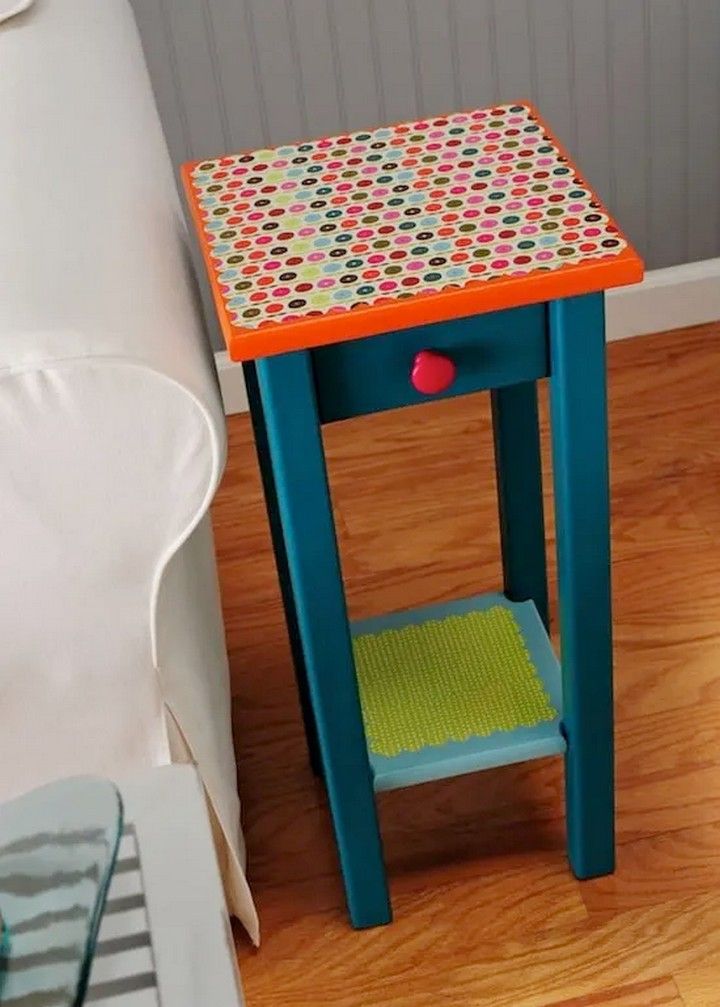
With three simple techniques, you can give your end table a colourful makeover. To begin, sand and clean the table’s surface. Select your paint colours and apply a foundation coat using a brush or roller. When the paint is dry, use painter’s tape to make geometric designs or stripes. Apply a second layer of paint in a variety of colours. Remove the tape and allow the table to dry completely. For further durability, apply a clear protective coat. Tutorial
28. DIY Recipe Cards from Scrapbook Paper
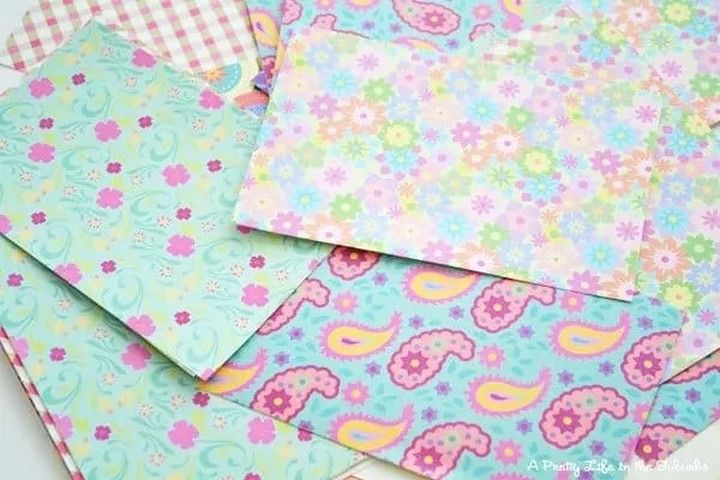
For a personalised touch in your kitchen, make DIY recipe cards out of scrapbook paper. Begin by making uniform-sized cards out of scrapbook paper. Write or print your favourite recipes on the cards with a pen or markers. You may also use ornamental components like as stickers, stamps, and decorations. Stack the recipe cards in a box or binder for convenient access and a visually appealing display of your culinary talents. Tutorial
29. Clothespin Wreath Made the Easy Way
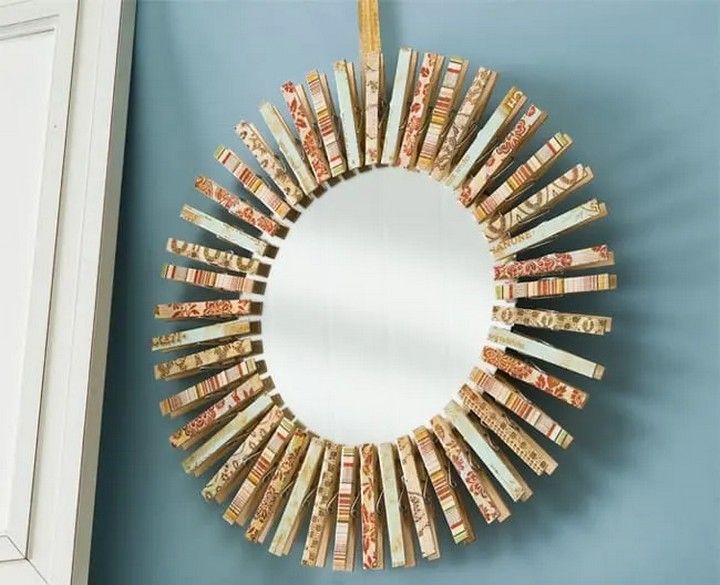
Follow these steps to make a simple clothespin wreath. Collect a wire wreath frame and several clothespins. Wrap the clothespins around the frame in an alternate pattern to produce a complete and textured effect. You may leave the clothespins unpainted or paint them in different colours for a more colourful appearance. Decorate the wreath with ribbons, bows, or other embellishments. For a simple yet attractive wreath, hang it on your door or wall. Tutorial
30. Easy Goodwill Toy Upcycle
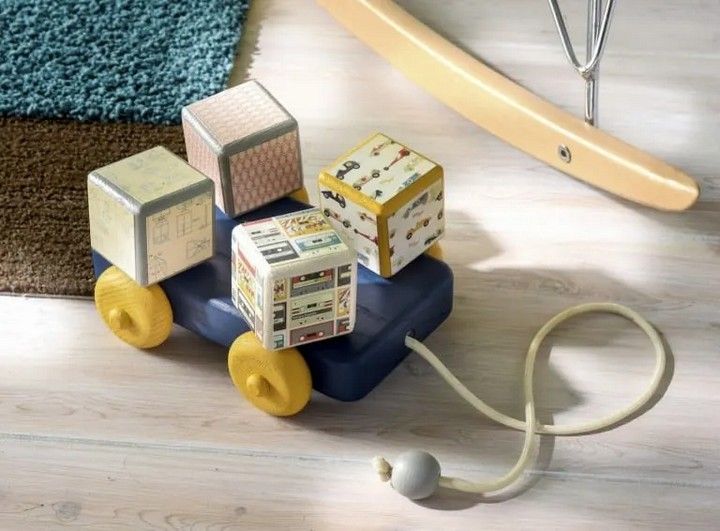
“Unleashing creativity with Goodwill toy upcycling!” With these simple DIY ideas, you can give outdated toys a new lease of life. Discover unlimited possibilities by changing action figures into bookends or reusing board game components into jewellery. With these fun and sustainable upcycling ideas, you can engage your imagination, save money, and minimise trash. Join the Goodwill toy upcycling effort right now!” Tutorial
31. DIY Pressed Flowers with Mod Podge
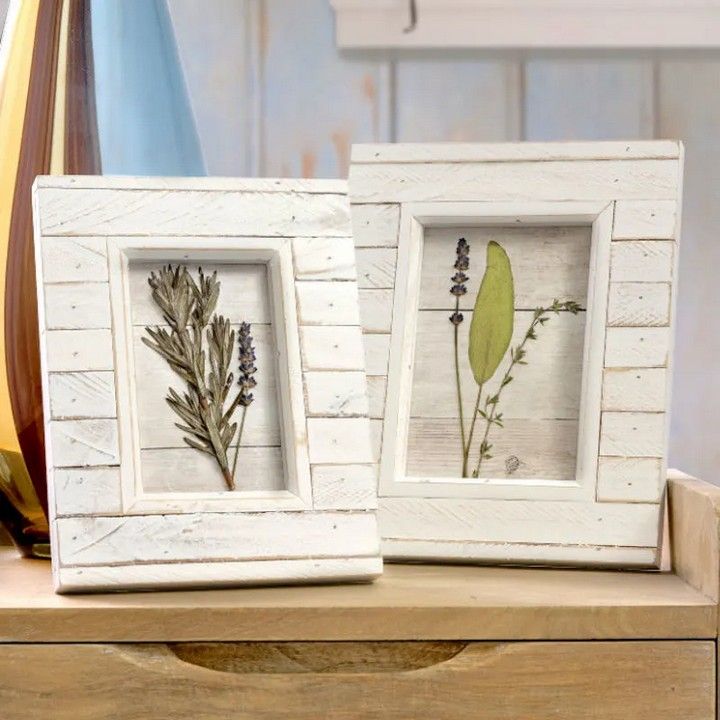
Mod Podge can be used to make lovely pressed flower crafts! Gather delicate blossoms, press them flat, then seal them with Mod Podge to keep their beauty. Allow your imagination to grow by crafting botanical bookmarks or embellishing glass jars with floral motifs. Seal and preserve the flowers using Mod Podge to create long-lasting and stunning designs. Explore the technique of pressed flower DIY with Mod Podge and incorporate the elegance of nature into your projects! Tutorial
32. DIY Mailbox Makeover
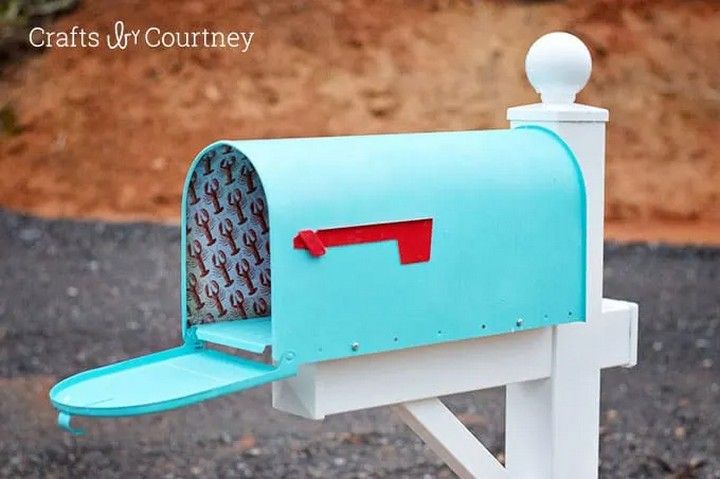
With this simple DIY project, you can give your mailbox a beautiful facelift! Make a simple mailbox into a conversation piece that represents your particular flair. Unleash your imagination by painting bright patterns and adding ornamental embellishments. With a few inexpensive materials and a little creativity, you can transform your mailbox into an attractive focal point that improves the curb appeal of your home. Make a lasting impression by upgrading your mailbox! Tutorial
33. Easy Washer Necklaces
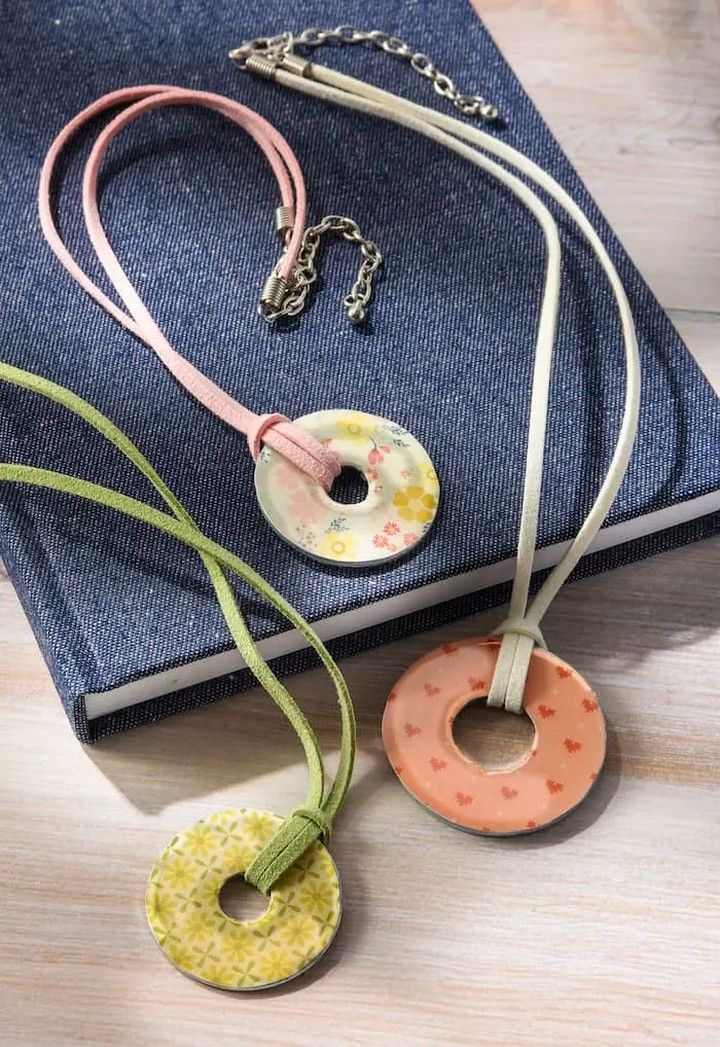
With this simple DIY project, you can make fashionable and one-of-a-kind necklaces out of washers! Collect bright washers and tie them together to create eye-catching jewellery. Personalise the washers by painting or adorning them with beads, charms, or enamel for a unique appearance. These trendy washer necklaces are inexpensive, easy to manufacture, and ideal for adding a bit of modern flair to any ensemble. Show off your DIY fashion sense by getting creative! Tutorial
34. Easy Fall Crafts – Scrapbook Paper Leaf
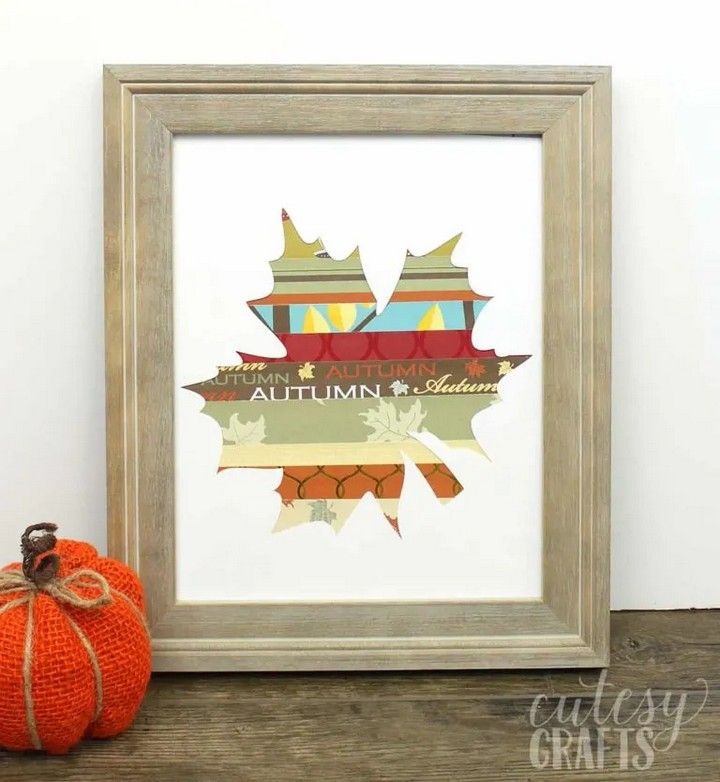
Embrace the beauty of autumn with this easy DIY project! Make lovely leaf ornaments out of scrapbook paper. Cut out leaf shapes from paper, embellish with markers or paint, then arrange them in a stunning fall display. Use them as a garland or as table or wall decorations. With these scrapbook paper leaves, you can let your imagination run wild and bring the warm colours of autumn into your house! Tutorial


