If you want to do some amazing Creative Crafts, try these 36 DIY Tissue Paper Crafts Ideas that are so easy and fun making projects for all ages. These paper crafts ideas are perfect to do with your kids. The best part of making things with tissue paper is that it holds its shape very well and it can be easily folded and twisted. If you want to host a party, try something pretty from scratch using tissue paper to welcome your guests. Make something wonderful from tissue paper to amaze people with your creative skills.
If you are looking for amazing realistic tissue Paper Flower Crafts to make, these projects are perfect for you. Doing these crafts with your kids will teach them about decoupage and the skills that go into the technique. You can make beautiful flowers from tissue paper for birthday party decor. If you are looking for affordable crafts for your kid’s birthday party to decorate their playroom, you can make something funny from tissue paper like a pom monster with a silly face. You can make a heart-shaped flower bouquet for your loved ones on Valentine’s Day.
These paper crafts ideas are perfect for home decor, birthday parties, and gifts. You’ll make beautiful hair bands, earrings, and bracelets for yourself and for others. These crafts are perfect for giving gifts on many occasions like Mother’s Day, teacher’s Day, and friendship day. They are inexpensive and less time-consuming projects. Tissue paper crafts are super effective for party decorations, as you can use tissue paper in so many ways. You can change the colour to match any holiday and party scheme. These paper crafts ideas are the best way to spend some quality time with your family and friends.
1. Tissue Paper Flower Party Lights
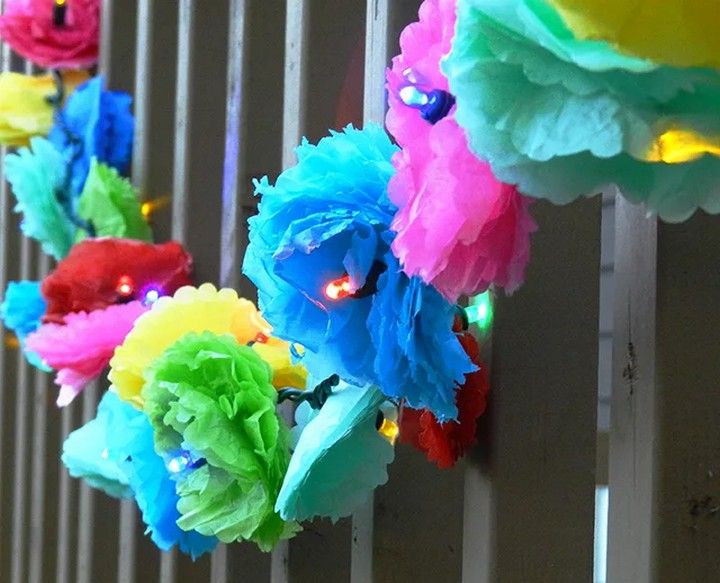
Tissue paper flower party lights may be used to create a lovely environment. Make floral forms out of tissue paper and fold accordion-style. Each flower should have a wire or string attached to the centre. Using a string of fairy lights, hang the flowers in varied lengths. The soothing glow illuminates the colourful blossoms when lit, converting any environment into a beautiful fantasy. These DIY party lights can bring a magical touch to your gatherings. Tutorial
2. Tissue Paper Flower Bracelet
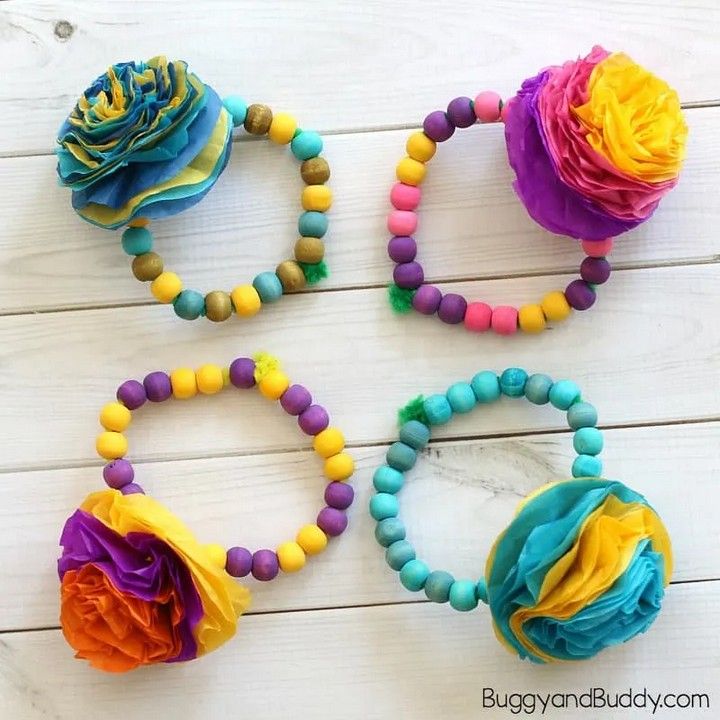
Create a lovely tissue paper flower bracelet by layering different colours and sizes of tissue paper into flower forms. Stack the flowers and secure the centre with a brad or little bead. Make a bracelet by attaching an elastic string or ribbon to both ends. This delicate item adds a splash of colour and a sense of whimsy to any ensemble, making it ideal for a lively and feminine appearance. Tutorial
3. DIY Tissue Paper Tie-Dyeing
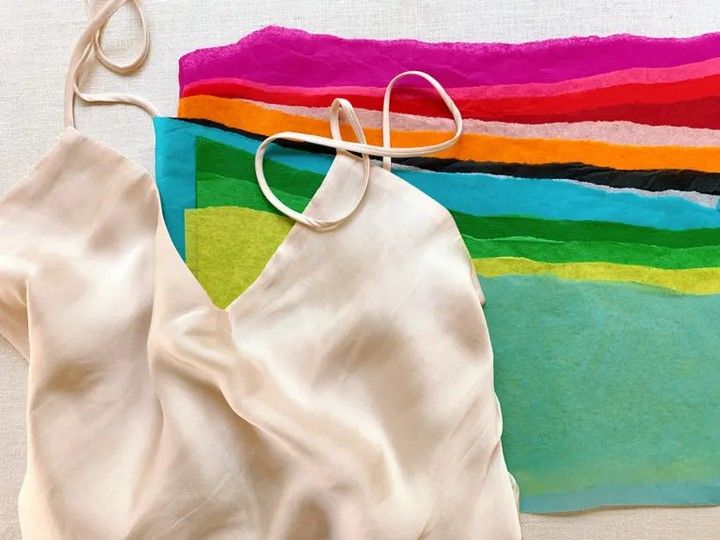
Try your hand at DIY tissue paper tie-dyeing. Begin by crumpling tissue paper into the necessary shapes and sizes. Wet the tissue paper and press it on a cloth surface like a T-shirt or canvas. Allow it to completely dry before carefully peeling off the tissue paper. The end result is a brilliant and one-of-a-kind tie-dye effect that gives your fabric a fun and colourful makeover. Tutorial
4. Tissue Paper Flower Bouquet Canvas
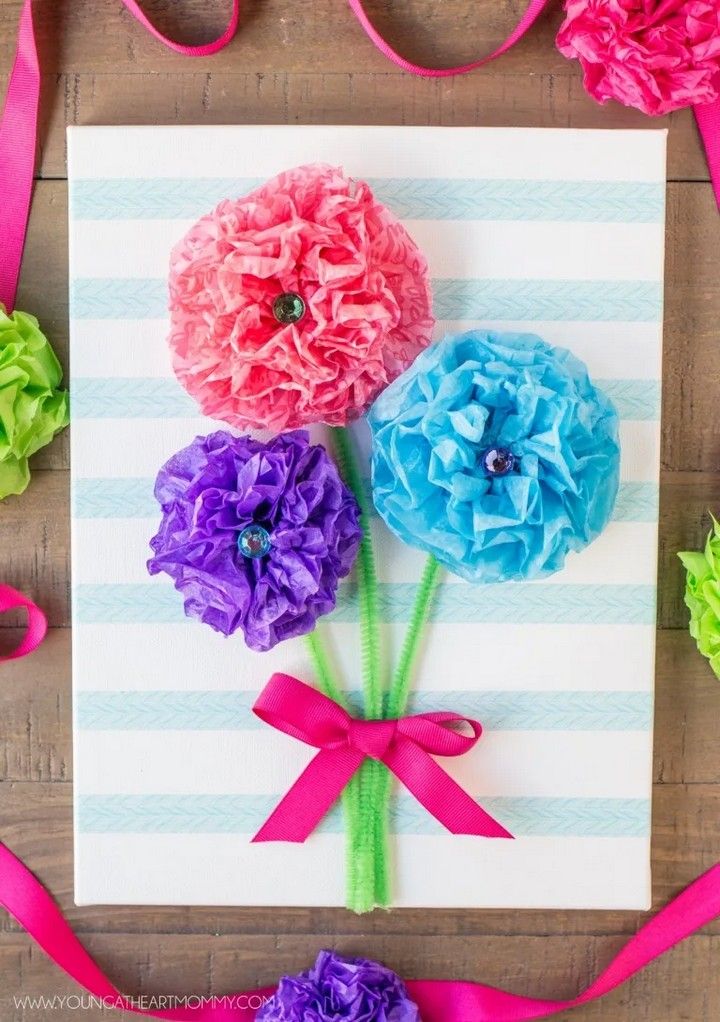
Make a lovely tissue paper flower bouquet canvas. Make floral forms out of tissue paper in a variety of sizes and colours. To make realistic-looking flowers, fold and stack the tissue paper petals. This tissue paper flower bouquet is perfect for giving as a gift on many occasions like birthday parties, wedding anniversaries, and Mother’s Day. Hang the completed artwork to create a vivid, three-dimensional floral display that will enliven any environment. Tutorial
5. Tissue Paper Tassel Garland
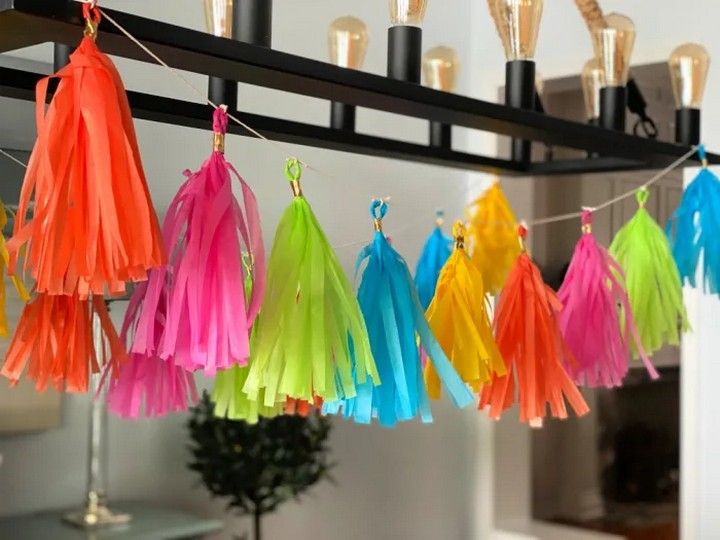
Make a tissue paper tassel garland for the holidays. Make large strips of tissue paper and fold them in half lengthwise. Leave approximately an inch of fringe uncut along the folded edge. Unfold the tissue paper and firmly coil it from one end to the other. Twist the coiled piece to make a tassel, then tie it with a thread or tape. Repeat with other coloured tissue paper strips, then string the tassels together to create a bright garland for parties or celebrations. Tutorial
6. Bleeding Tissue Paper Canvas Art
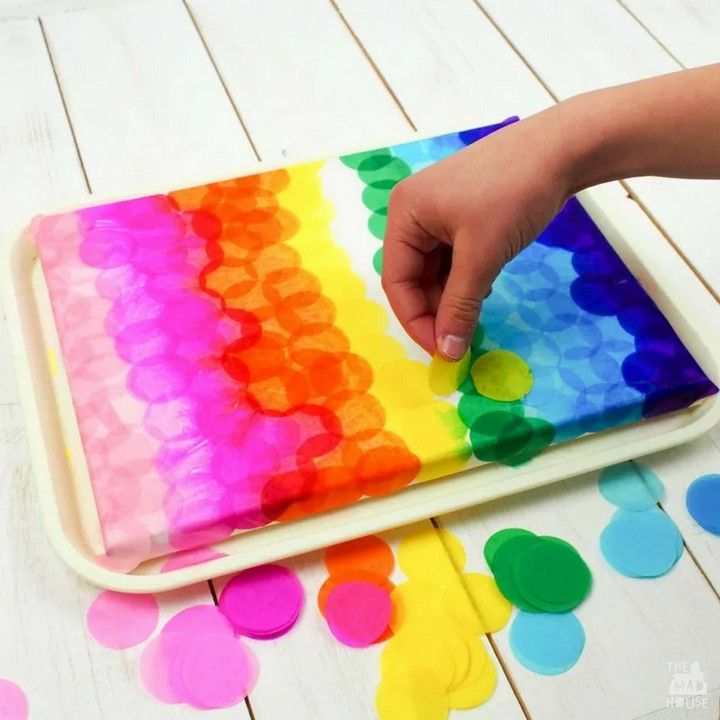
Investigate the enthralling method of bleeding tissue paper canvas art. Wet a Canvas Projects and add bleeding tissue paper squares on top. To trigger the bleeding effect, sprinkle water on the tissue paper. Allow it to set for a few minutes to allow the colours to transfer and merge. Remove the tissue paper to uncover a colourful, abstract work of art. This one-of-a-kind art genre provides limitless opportunities for creating vibrant and dramatic compositions. Tutorial
7. Tissue Paper Heart Wreath
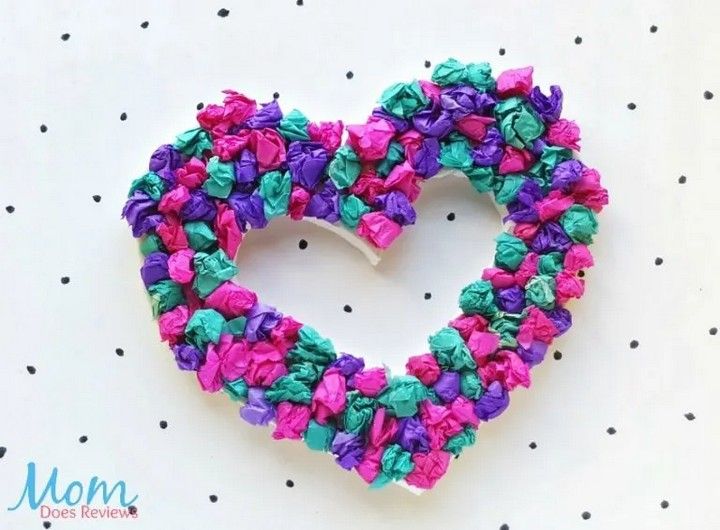
Make a beautiful tissue paper heart wreath. Tissue paper should be cut into small squares or strips. Each square should be folded in half and twisted at the bottom to make a flower-like shape. Using hot glue, adhere the tissue paper flowers to a heart-shaped foam or wire wreath structure. Continue until the entire form is covered, resulting in a lovely and textured wreath that will give a bit of charm and warmth to any room. This tissue paper heart wreath is perfect for Valentine’s Day. Tutorial
8. Toilet Paper Roll Mini PInatas
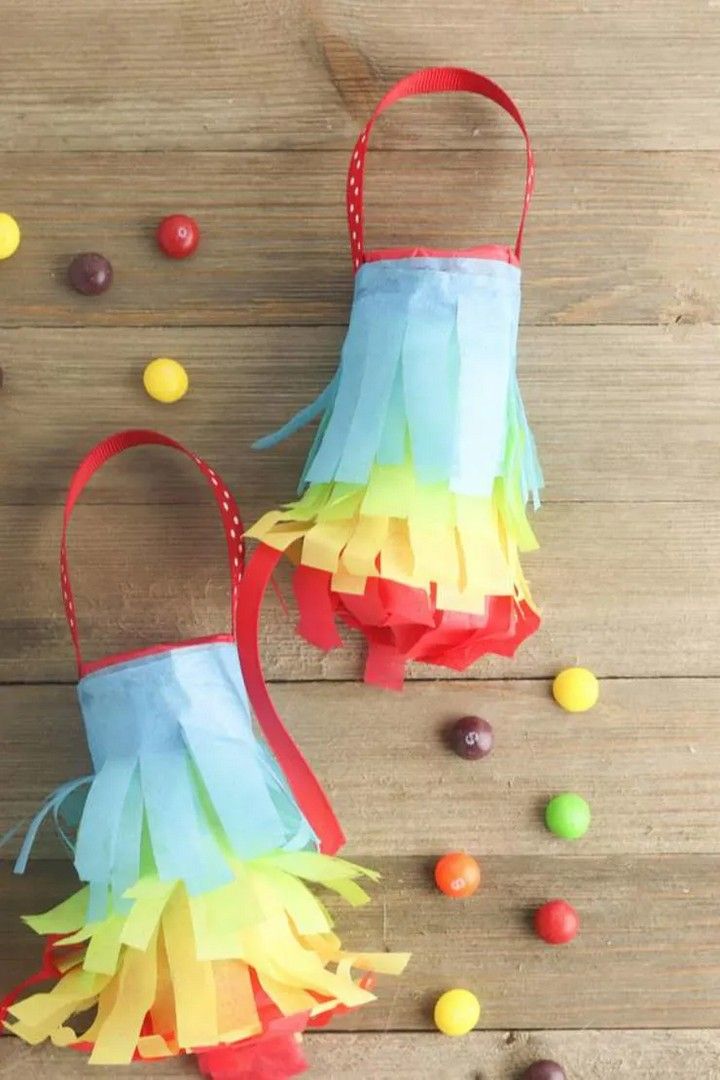
Make lovely tiny pietas out of toilet paper rolls. Flatten and cut a toilet paper roll into smaller cylinders. Decorate each cylinder with colourful tissue paper and adhere it with glue. Fill the pietas with little snacks or sweets. Hang them with a thread or ribbon. Tissue paper or cardboard circles can be used to seal the ends. These small plates, ideal for parties and festivities, will delight your visitors. Tutorial
9. Tissue Paper Covered Pots
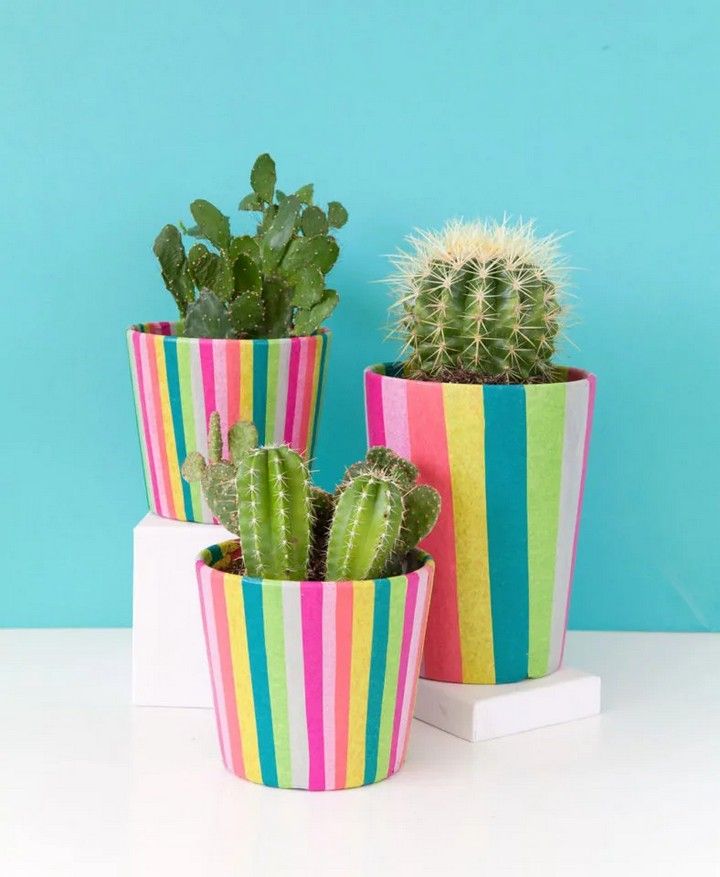
The tissue paper may be used to give ordinary pots a colourful facelift. Begin by adding a coat of Mod Podge or adhesive to the surface of the pot. The tissue paper may be cut into a variety of shapes and sizes. Smooth out any creases or bubbles by pressing the tissue paper against the pot. Seal it with another layer of Mod Podge or glue. Allow it to dry completely before using it to make colourful and creative pots to liven up your plants or home decor. Tutorial
10. Tissue Paper Mason Jar Lanterns
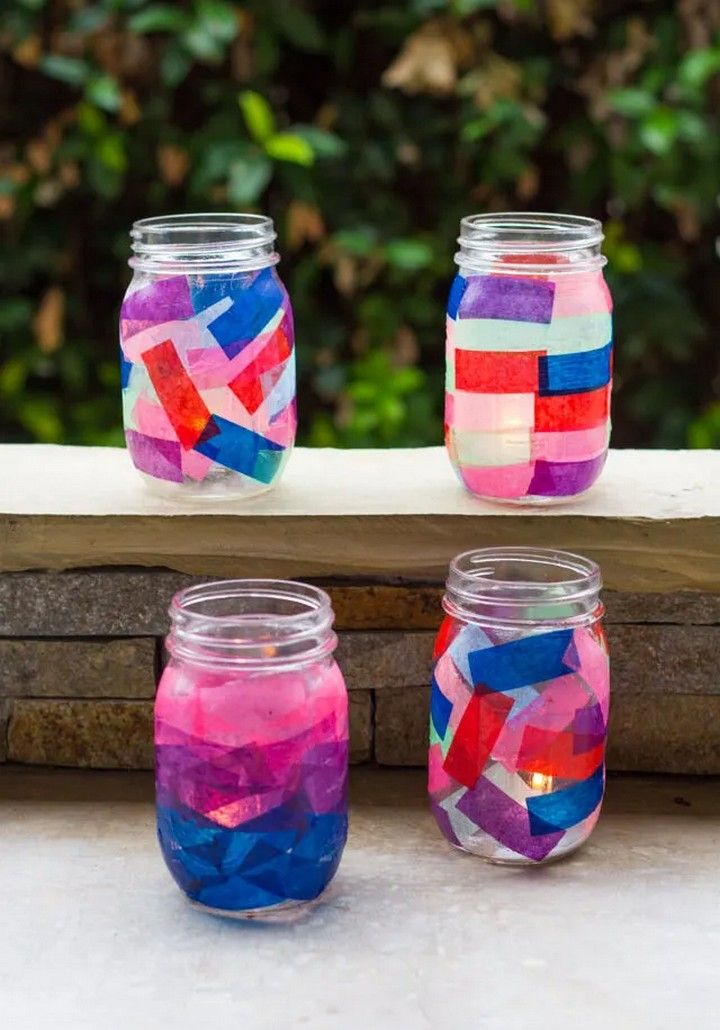
Make beautiful tissue paper Mason jar lanterns. Make little squares or shapes out of tissue paper. To a clean Mason jar, apply a coat of Mod Podge or adhesive. Overlap the tissue paper pieces on top of the jar, smoothing out any creases. Allow it to dry completely. Insert a tea light or LED candle into the jar and see how the delicate illumination highlights the colourful tissue paper, creating a pleasant and wonderful environment. Tutorial
11. Faux Stained Glass House
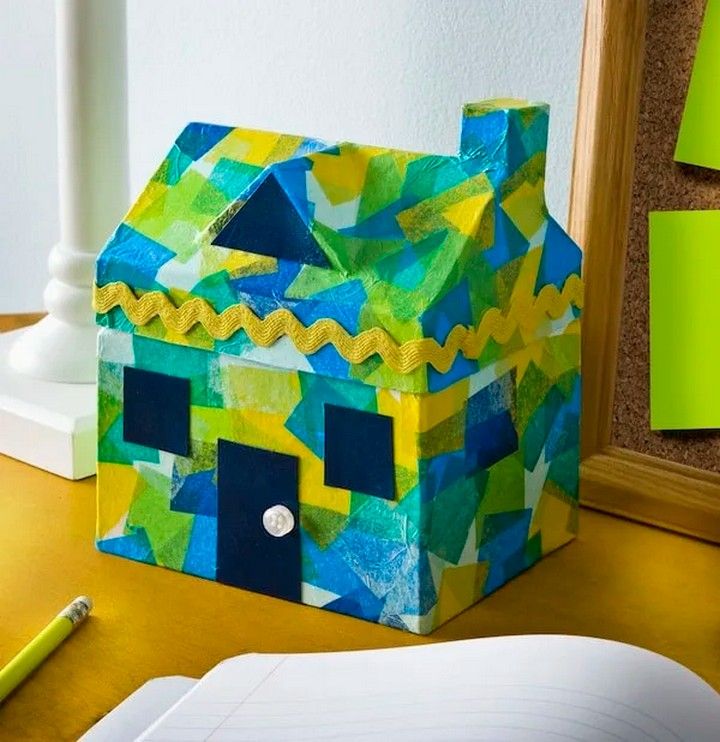
Make stunning tissue paper Mason jar lights. Cut tissue paper into tiny squares or shapes. Apply a coating of Mod Podge or glue to a clean Mason jar. Place the tissue paper pieces on top of the jar, overlapping them and smoothing out any creases. Allow it to totally dry. Insert a tea light or LED candle into the jar and watch as the delicate lighting illuminates the colourful tissue paper, creating a comforting and wonderful environment. Tutorial
12. Tissue Paper Sunflower Craft
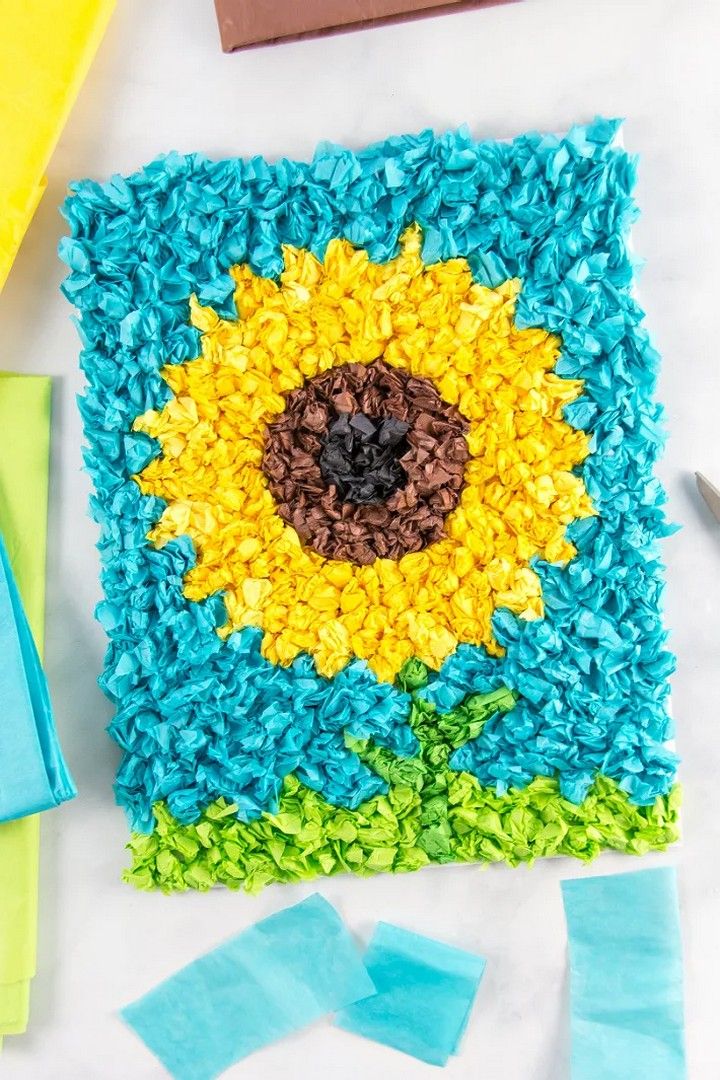
Make a charming tissue paper sunflower craft. For the flower centre, cut a wide circle of yellow construction paper. Make petals out of tissue paper in yellow, orange, and brown. Each petal should be crumpled to provide texture. Glue the petals around the circle’s edge. Make a stem and leaves out of green construction paper. The end product is a cheery sunflower that adds a splash of colour and nature to any space. Tutorial
13. Vase with Tissue Paper
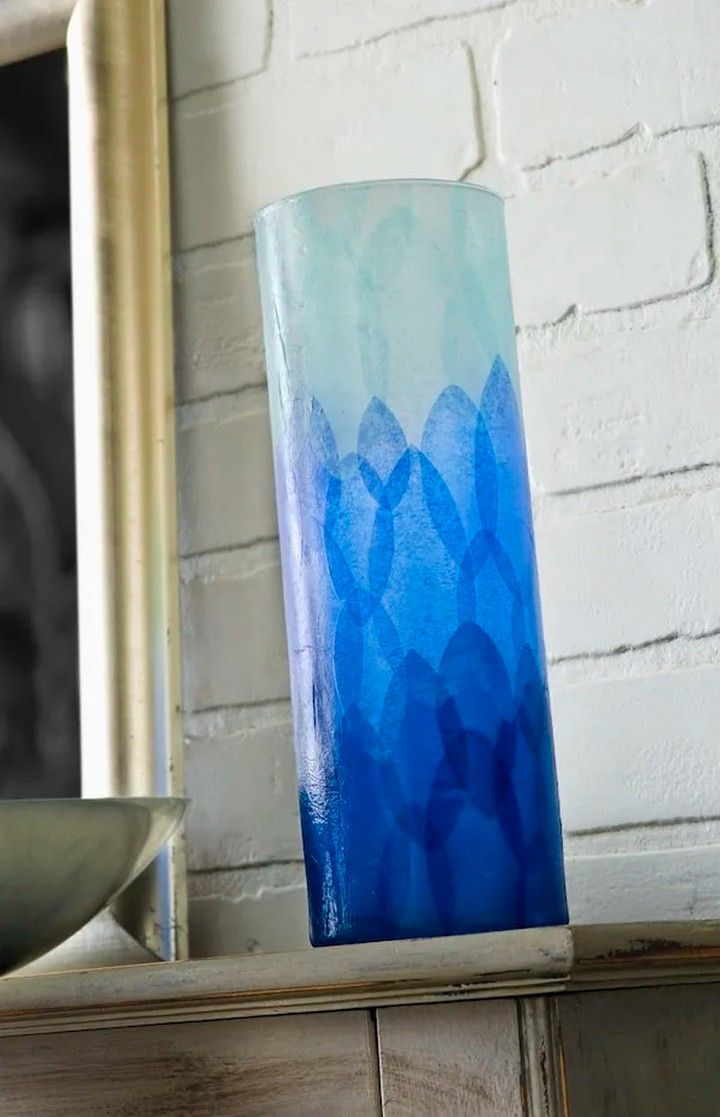
The tissue paper may be used to transform a basic vase into a vivid centrepiece. Make little squares or shapes out of tissue paper. To the vase, apply a thin layer of Mod Podge or adhesive. Overlap the tissue paper pieces on the vase, smoothing out any creases. Continue until the vase is completely coated. Allow it to dry fully before enjoying your colourful and textured vase, which adds a splash of inventiveness to your environment. Tutorial
14. Wine Bottles Using Tissue Paper
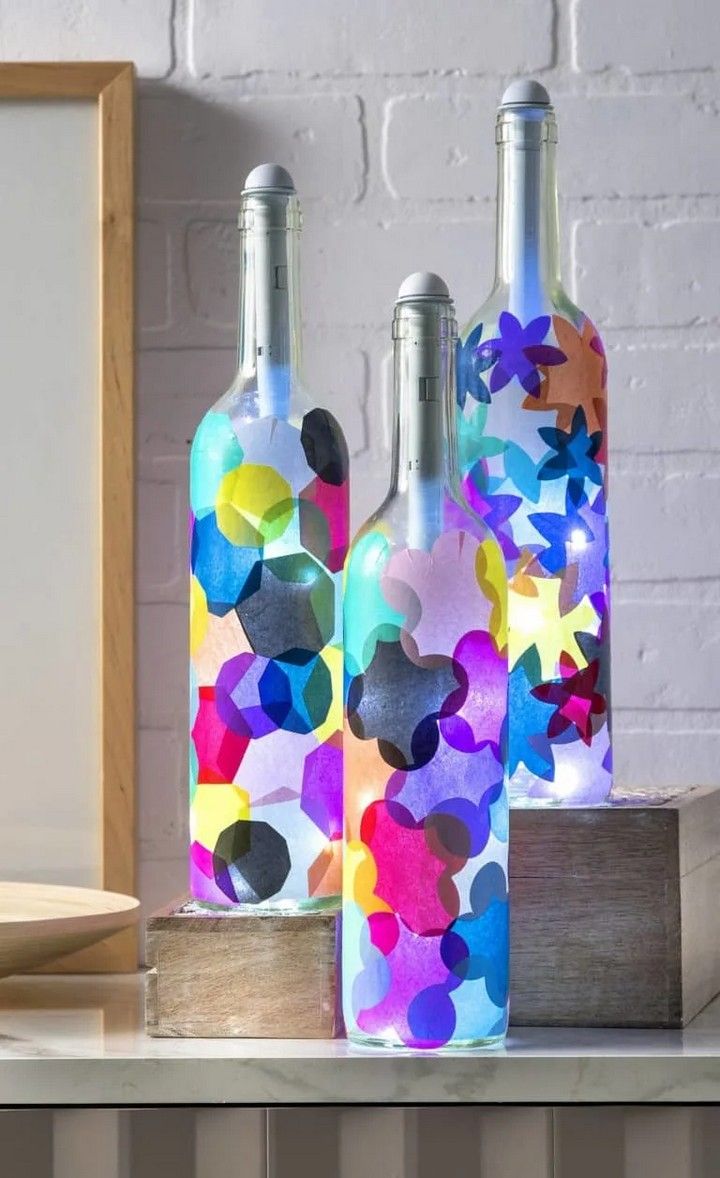
Tissue paper may be used to decorate empty wine bottles. Make strips or forms out of tissue paper. Apply a coat of Mod Podge or adhesive to the bottle’s surface. Place the tissue paper pieces on the bottle, carefully pushing down and smoothing out any creases. Rep until the entire bottle has been coated. Allow it to dry completely, and you’ll have wonderfully embellished wine bottles that offer a splash of colour and elegance to your room. Tutorial
15. Bleeding Tissue Paper Birds Wall Art
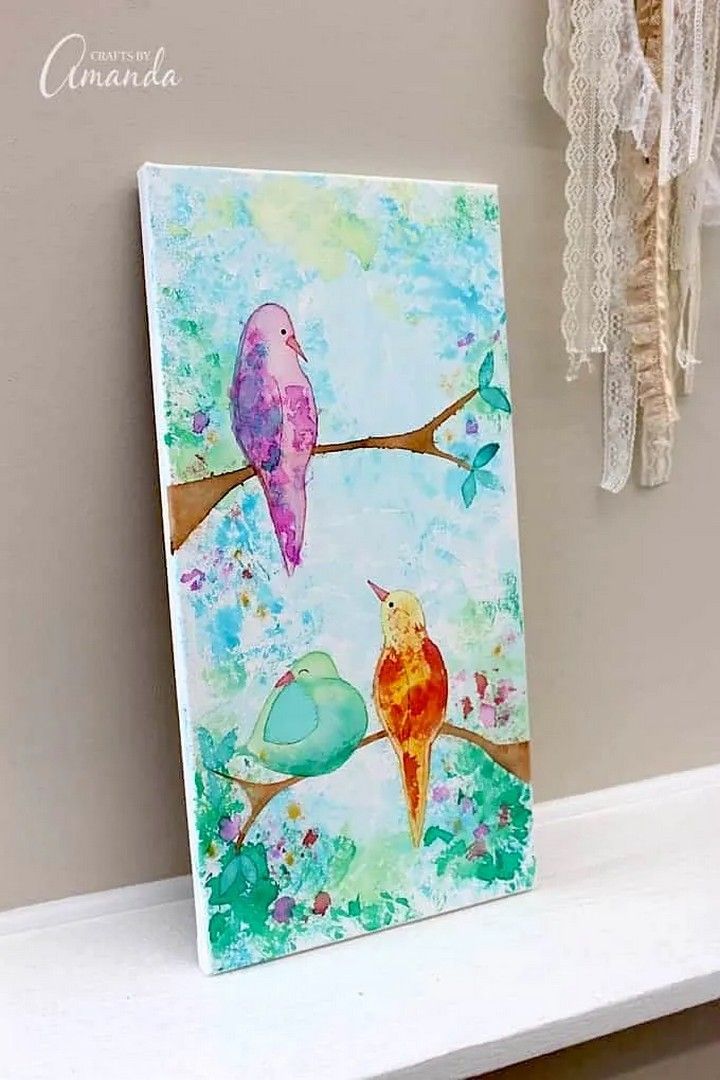
Make eye-catching wall art using bleeding tissue paper and bird silhouettes. Cut black construction paper into bird shapes. Place wet bleeding tissue paper squares on top of the bird silhouette. To trigger the bleeding effect, sprinkle water on the tissue paper. Allow it to totally dry. Remove the tissue paper to reveal bright bird silhouettes against a colourful backdrop. Frame and exhibit this one-of-a-kind and eye-catching work of art. Tutorial
16. Tissue Paper Mason Jar Centerpieces
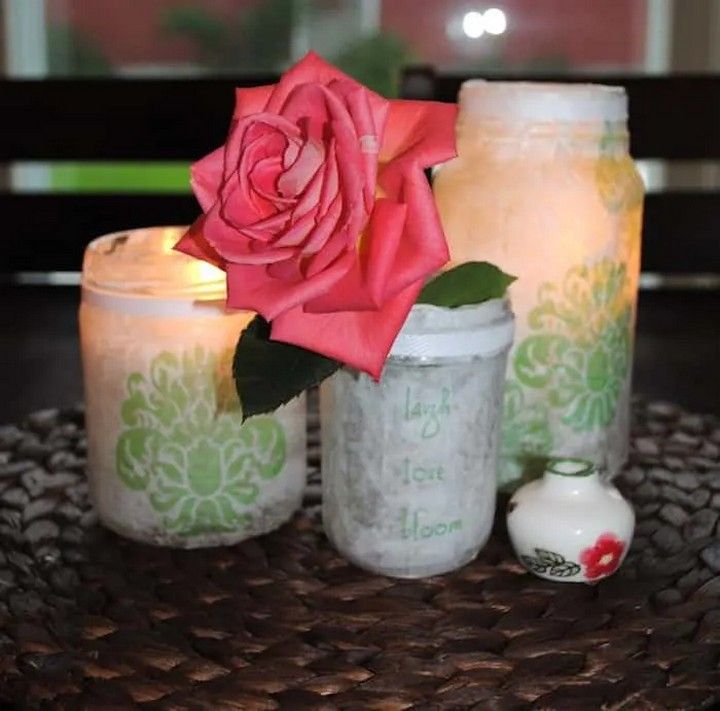
Make lovely tissue paper Mason jar centrepieces. Make little squares or shapes out of tissue paper. Cover the exterior of a clean Mason jar with Mod Podge or adhesive. Overlap the tissue paper pieces on top of the jar, smoothing out any creases. Allow it to dry completely. Fill the jars with water and fill them with fresh flowers to create a delightful and colourful centrepiece that will brighten up any table or gathering. Tutorial
17. Mod Podge Tissue Paper Frame
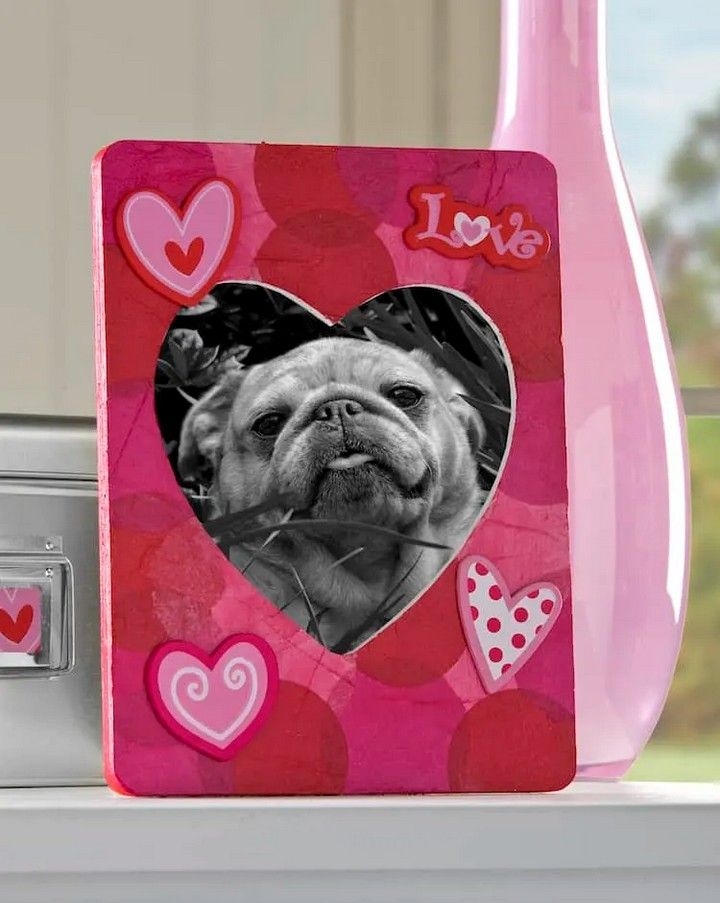
Make a gorgeous tissue paper frame using Mod Podge. Using Mod Podge, coat a basic wooden or cardboard frame. Overlap the tissue paper pieces on the frame, smoothing out any creases. To seal it, add another coat of Mod Podge on top. Allow it to dry completely. Insert a photo into your wonderfully adorned frame and display it to bring a personalised and artistic touch to your home. Tutorial
18. Tissue Paper Hearts
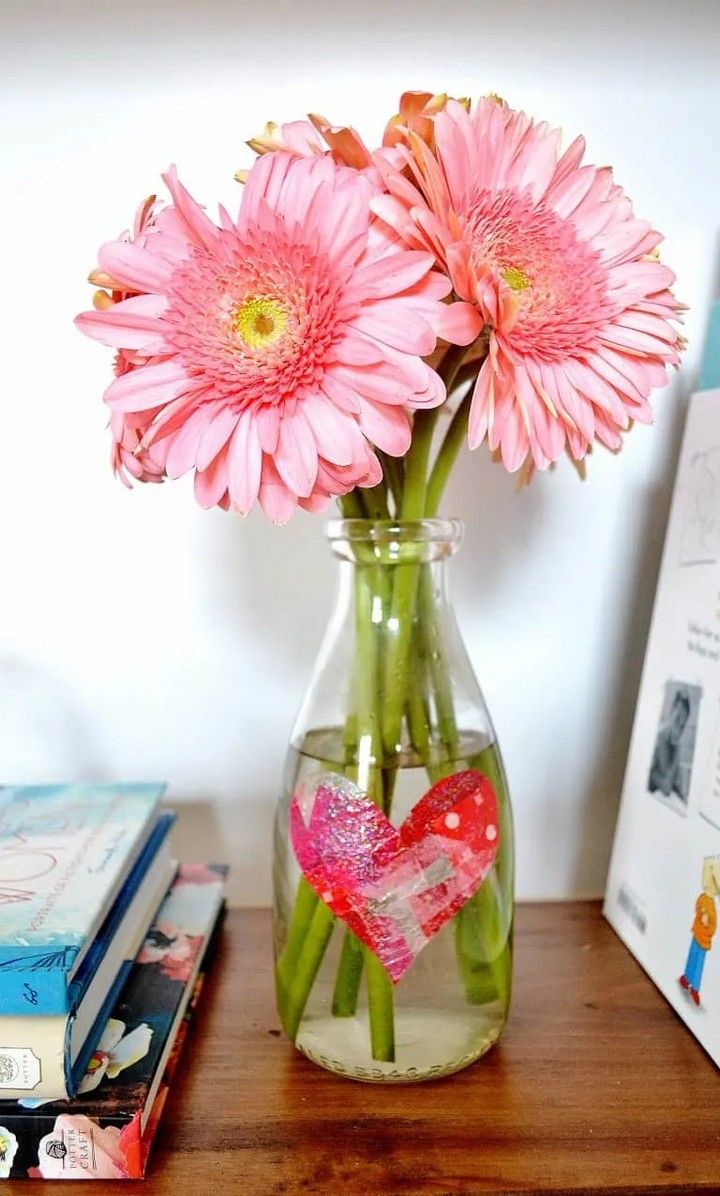
Make beautiful tissue paper hearts. Fold the tissue paper in half and draw a half-heart shape along the fold. Cut along the line, resulting in an unfolded symmetrical heart. Rep with different tissue paper colours. Accordion-fold the hearts, then fasten the centre with a piece of twine or wire. Separate the layers gently to make a dimensional and colourful tissue paper heart decoration for a variety of events. Tutorial
19. Easter Bunny Canvas Craft for Kids
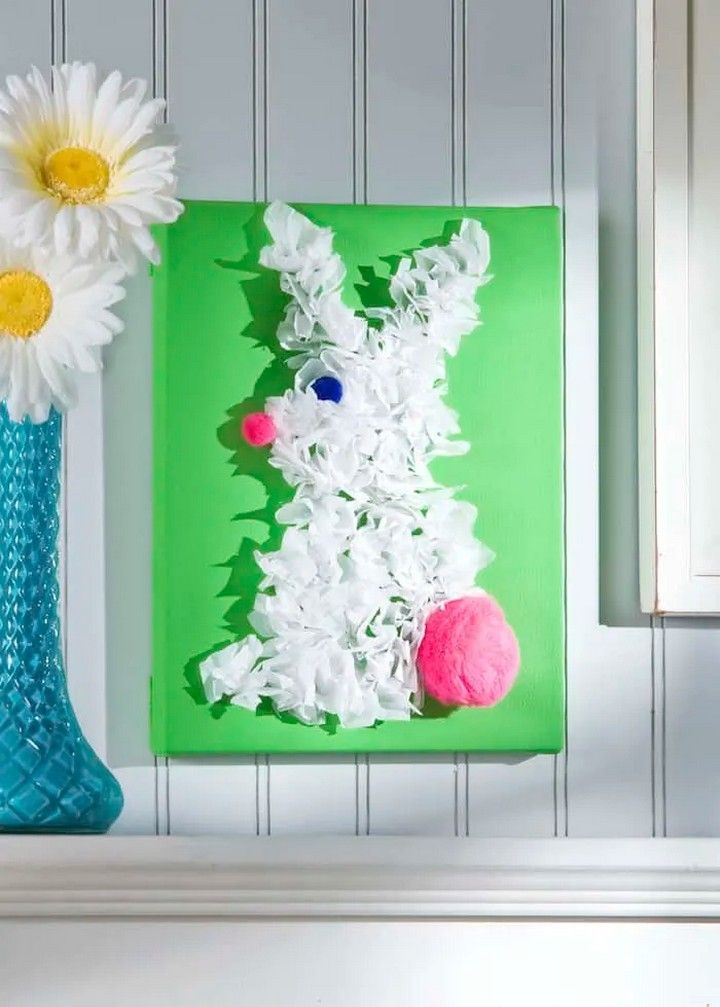
Make a delightful Easter Bunny canvas activity with the kids. Give each youngster a tiny canvas and some acrylic paint. Instruct them to paint the canvas in the background colour of their choice. Once dried, help them create a lovely rabbit shape using white paint. They can include features like as eyes, noses, and whiskers. The end product is a cute Easter Bunny canvas that kids will be happy to exhibit. Tutorial
20. Mason Jars That Look Like Bunnies
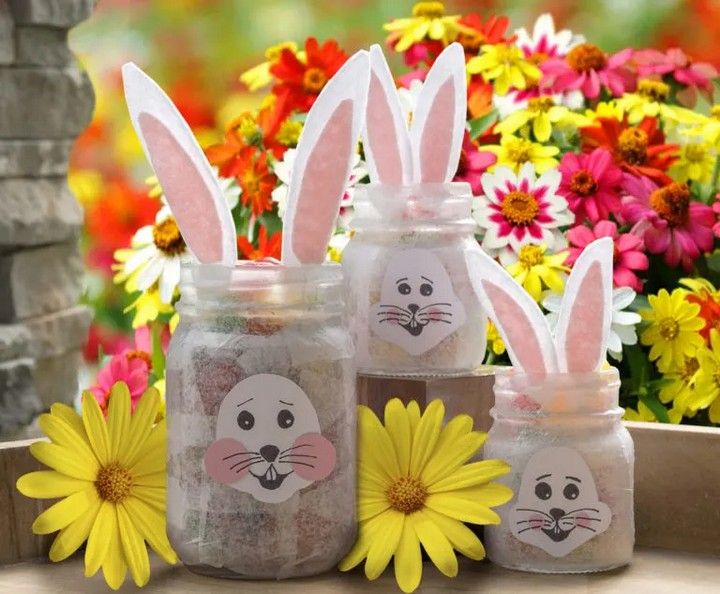
Make lovely bunny-themed décor out of Mason jars. Pastel colours, such as pink or light blue, should be used to paint the jars. Make rabbit faces with white paint, including eyes, a nose, and whiskers. Attach cut-out felt or paper shapes to the lids to make floppy ears. Fill the jars with Easter goodies or use them to store candles. These rabbit Mason jars will add a fun touch to your Easter festivities. Tutorial
21. Luau DIY Tissue Paper Pineapples
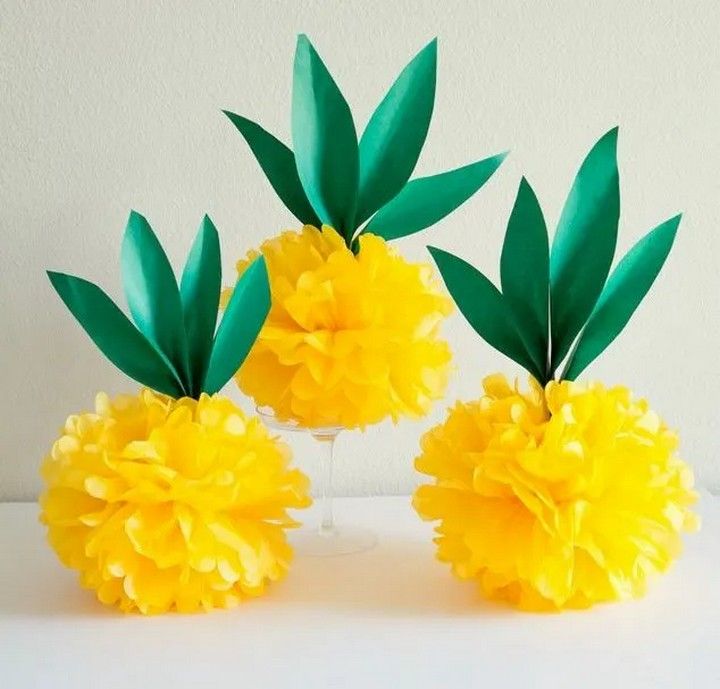
Make colourful tissue paper pineapples for a luau-themed party. To create a pineapple texture, roll each strip firmly and bind the bottom with tape or glue. Starting at the bottom and working your way up, attach the coiled strips to a foam or paper cone form. Rep until the entire cone has been covered. Use these vibrant tissue paper pineapples as tropical decorations for your luau. Tutorial
22. Ten Minute Votives for the 4th of July
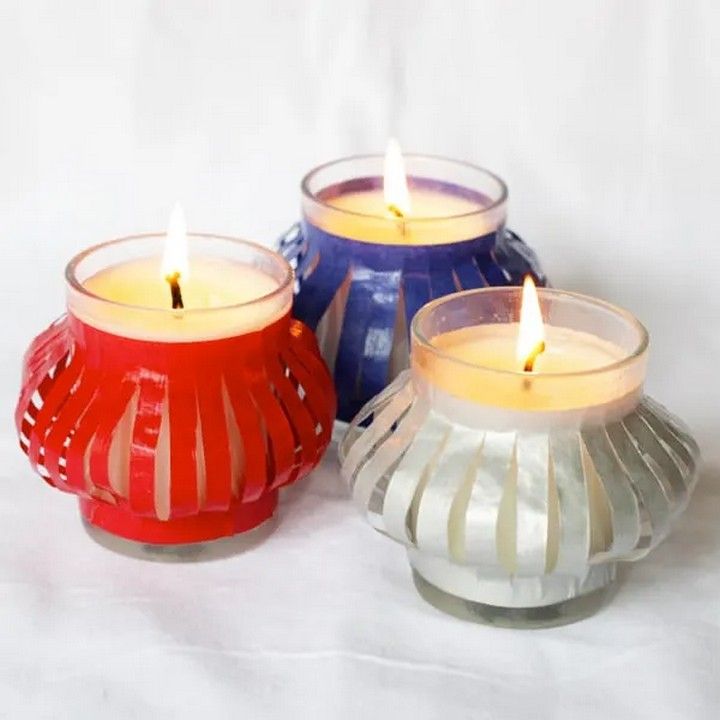
In only 10 minutes, you can make beautiful 4th of July votives. Wrap transparent glass votive holders with red, white, and blue ribbon and secure them with glue or double-sided tape. Insert LED tea lights into the holders and fill them with sand or tiny stones. These patriotic votives will lend a patriotic flavour to your Fourth of July celebrations with no effort. Tutorial
23. DIY Candy Dish from Dollar Tree
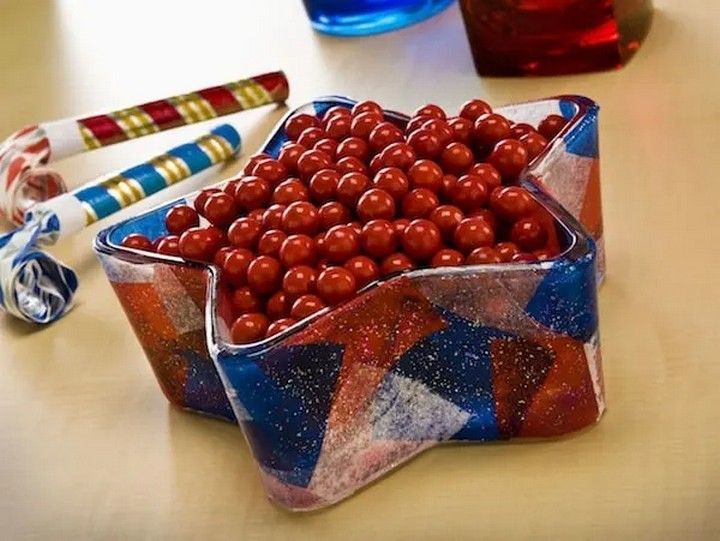
Make your own candy dish with Dollar Tree items. Buy a glass or plastic bowl as well as a candlestick holder. Apply E6000 glue or strong adhesive to the top of the candlestick holder, then gently set the bowl upside down on top. Allow it to dry completely. As a consequence, an attractive candy dish that is both economical and fashionable is created, ideal for presenting goodies at gatherings or as a decorative accent. Tutorial
24. Party Favors Shaped Like Rockets
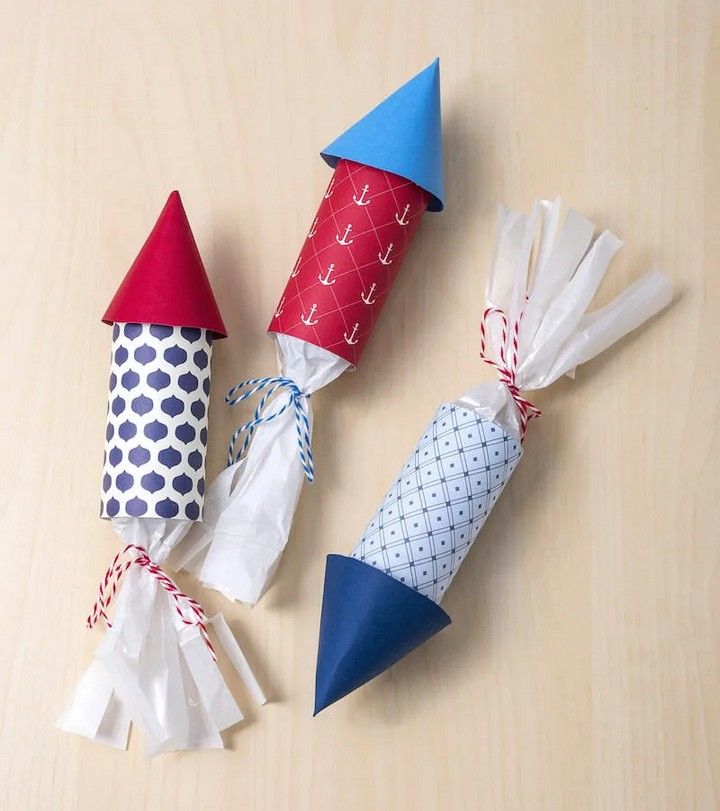
Make fantastic rocket-shaped party favours. Make the rocket body out of empty toilet paper rolls. Paint them in bright colours and use markers or construction paper to add elements like windows and fins. Attach a short piece of thread or ribbon to the top to serve as a “fuse.” Fill the rockets with little trinkets or candies. These cute rocket party favours are guaranteed to please your guests and provide a fun touch to any occasion. Tutorial
25. Easy Tissue Paper Pumpkin Favors
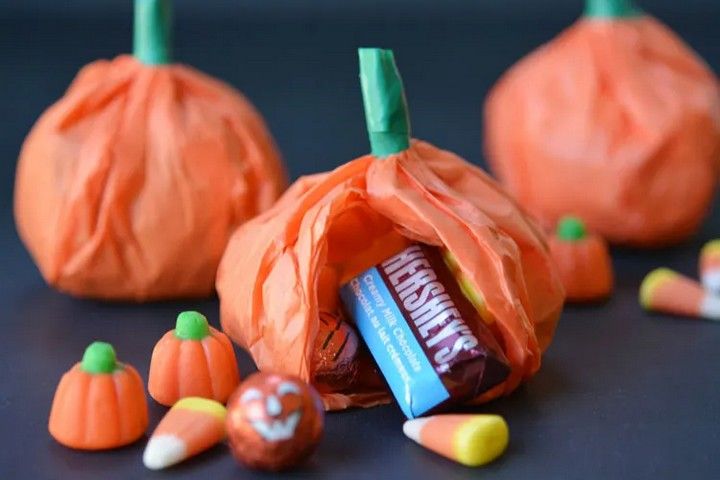
Make gorgeous tissue paper pumpkin favours in minutes. Fill each square with a tiny handful of candy or snacks. Gather the tissue paper corners and twist them together to make a pumpkin shape. Twist a green pipe cleaner around the twisted tissue paper to make a stem. These adorable pumpkin favours are ideal for Halloween or fall-themed gatherings. Tutorial
26. Fall Leaves Tissue Paper Craft
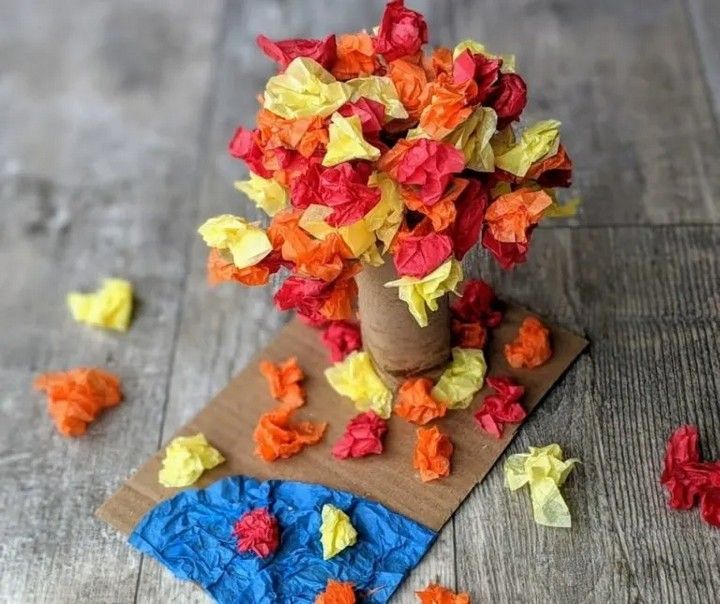
Make a lovely autumn leaves tissue paper craft. Make leaf forms out of tissue paper in fall colours including red, orange, and yellow. Apply adhesive to a piece of paper or cardboard and press the tissue paper leaves onto it, slightly overlapping them. When the leaves are dry, cut around them to make separate pieces. Use them as a festive garland or for other fall-themed decorations to bring the beauty of autumn home. Tutorial
27. Decorate a Pumpkin with Confetti
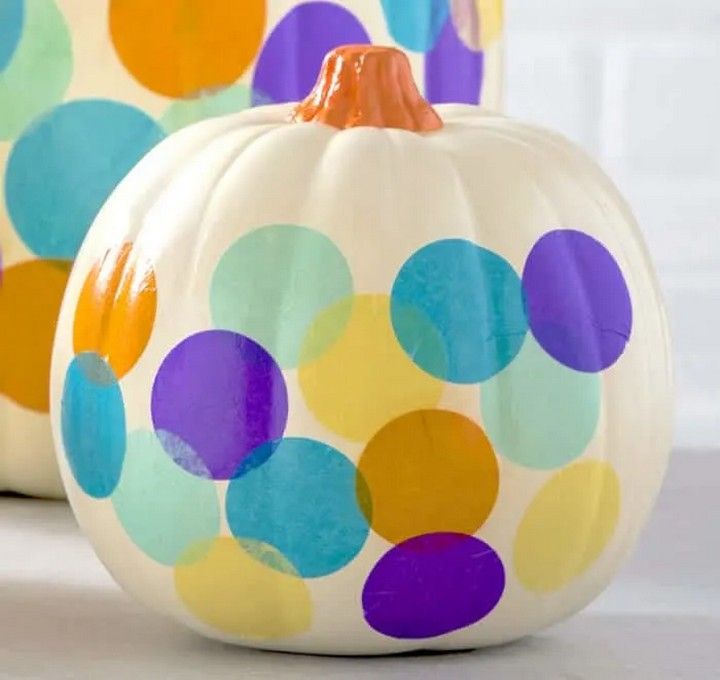
Confetti pumpkin decorating is a joyful and simple activity. Begin by putting a coat of craft glue or Mod Podge on the surface of the pumpkin. Colourful confetti should be sprinkled all over the pumpkin, gently pushing it down to adhere. Continue to sprinkle confetti until the pumpkin is completely coated. Allow it to dry completely. The end result is a bright and colourful pumpkin that will brighten up your fall or Halloween decorations. Tutorial
28. Mason Jar Lanterns
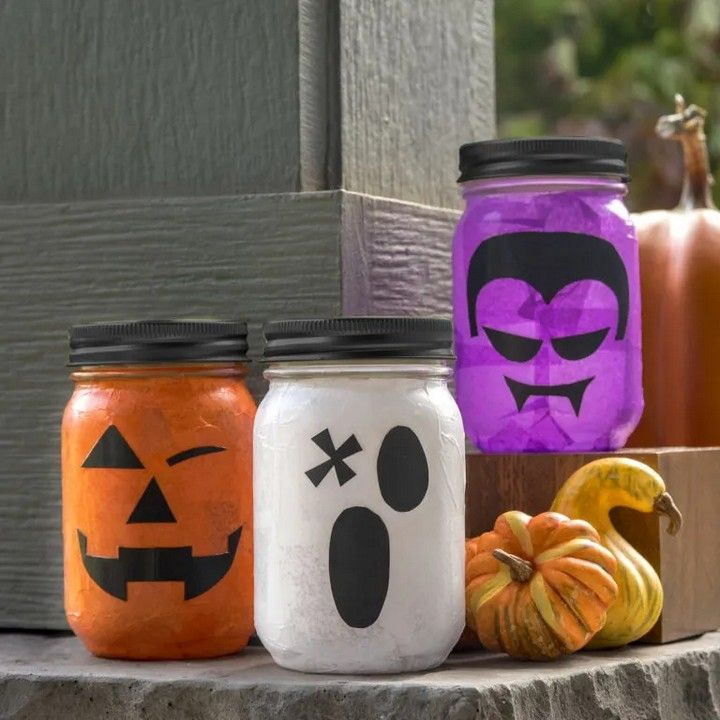
Make beautiful Mason jar lanterns. Mason jars should be clean and dry. Apply a coat of glass paint or spray paint to the inside of the jar in the colour of your choice. Allow it to dry completely. Fill the jars with LED tea lights or string lights. If desired, secure the lids or wrap beautiful ribbons or string around the jar’s neck. These easy-to-make lanterns will offer a warm and inviting atmosphere to any room or event. Tutorial
29. Tissue Paper Turkey Craft For Kids
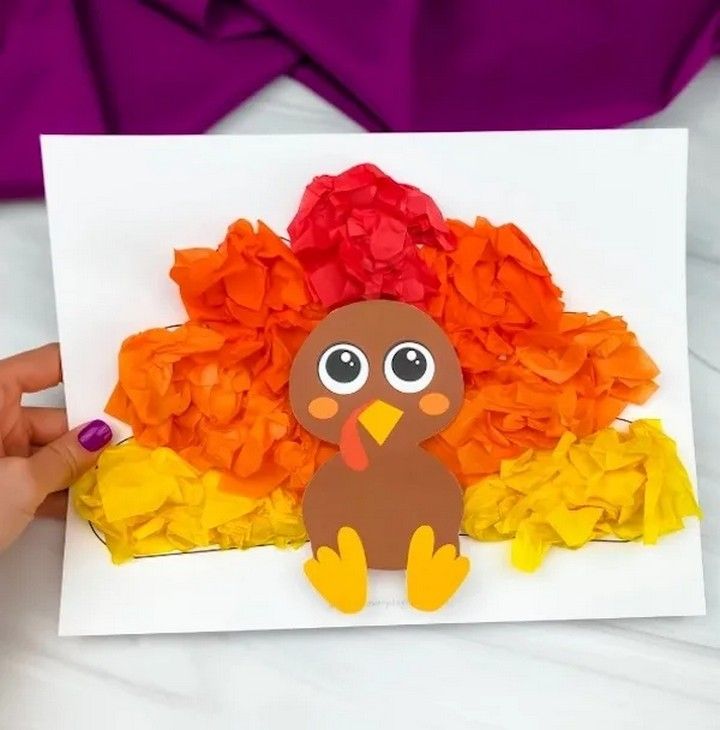
Make a colourful tissue paper turkey project with the kids. Construct a turkey body out of construction paper. Make little squares or shapes out of tissue paper in a variety of colours. Apply adhesive on the turkey body and let children adhere tissue paper pieces onto it to make feathers. To finish the turkey, add googly eyes and a beak. This lovely activity allows children to express their creativity while also learning about Thanksgiving. Tutorial
30. Tissue Paper & Pom Pom Wreaths
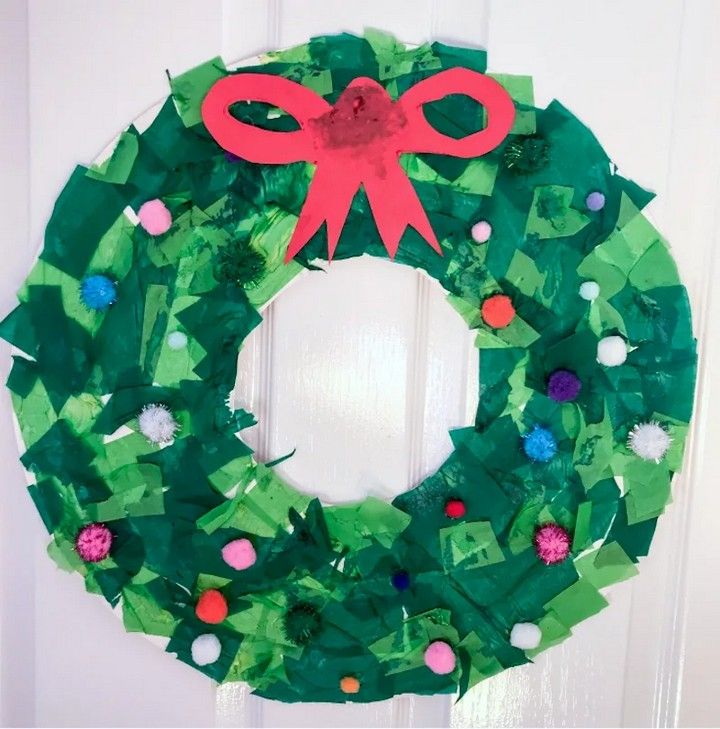
Make adorable wreaths out of tissue paper and pom poms. Make little squares or shapes out of tissue paper. Glue or tape the tissue paper to a foam or wire wreath shape, covering the entire area. Glue pom poms in a variety of colours and sizes to the wreath, interspersed with tissue paper. Hang the wreaths on doors or walls for a festive decoration that will liven up any place. Tutorial
31. Tissue Paper & Paper Plate Reindeer
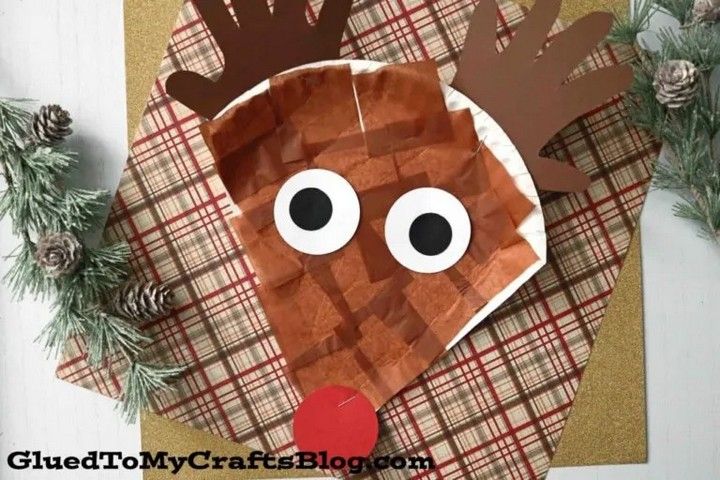
Tissue paper and paper plates may be used to make lovely reindeer decorations. Make antlers out of brown construction paper and glue them on the back of a paper plate. Make a reindeer face out of a paper plate and add eyes, a nose, and a mouth. Tear or cut little pieces of brown tissue paper and glue them all over the reindeer’s face and antlers to create a textured and fuzzy effect. Decorate your house or school with these beautiful reindeer decorations for a festive touch throughout the holiday season. Tutorial
32. Mason Jar Snowman
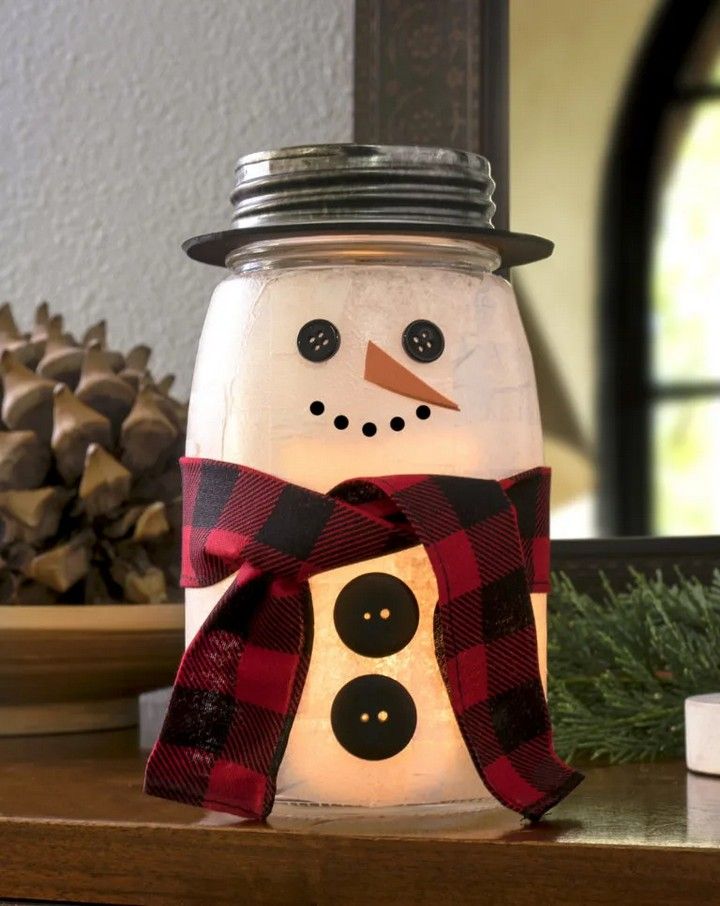
Make a charming Mason jar snowman. Allow a clean Mason jar to dry after painting the exterior with white acrylic paint. Create eyes, a mouth, and buttons on the jar using black paint. As the carrot nose, glue a little orange triangle-shaped piece of felt or construction paper. Wrap a scarf made of cloth or ribbon around the neck of the jar. Use the jar as a decorative item or fill it with LED lights. This adorable snowman Mason jar provides a festive and quirky touch to your holiday decor. Tutorial
33. Tissue Paper Flowers
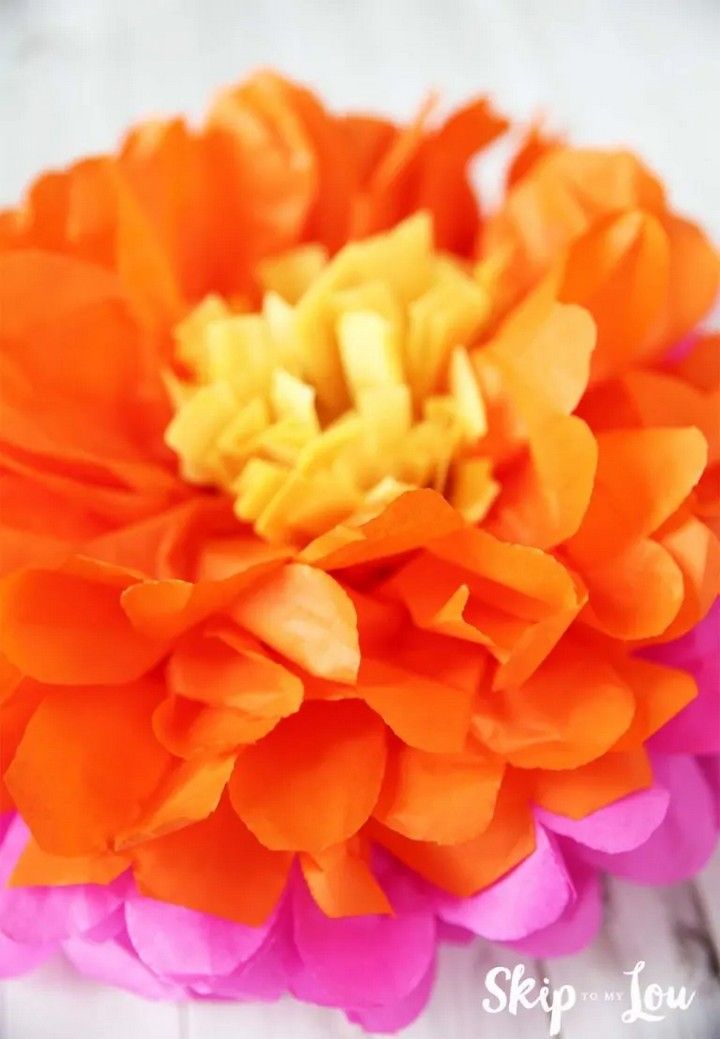
Make lovely tissue paper flowers. Tissue paper should be cut into rectangular pieces. Stack multiple layers of tissue paper on top of one another. Create pleats by folding the piled tissue paper accordion-style. Use a wire or twine to secure the centre of the folded tissue paper. Separate and fluff each layer gently to produce a floral shape. To make the required petal shapes, trim the ends. These tissue paper flowers are perfect for weddings, events, and home décor. Tutorial
34. Tissue Paper Butterflies
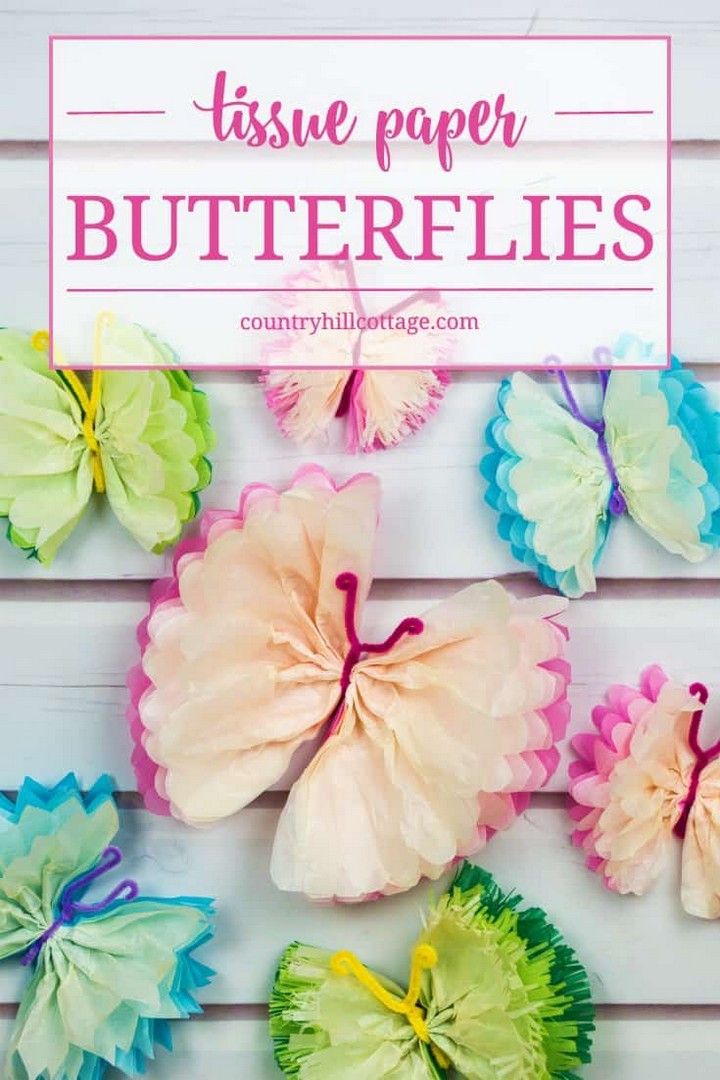
Make adorable tissue paper butterflies. Make rectangular forms out of tissue paper. Back and forth, fold each piece accordion-style. Secure the folded tissue paper in the centre with a wire or pipe cleaner. Separate and fluff the layers gently to form butterfly wings. Attach pipe cleaner antennae and googly eyes. These vibrant tissue paper butterflies are ideal for crafts, decorating, or a fun pastime for children. Tutorial
35. DIY Tissue Paper Rainbow
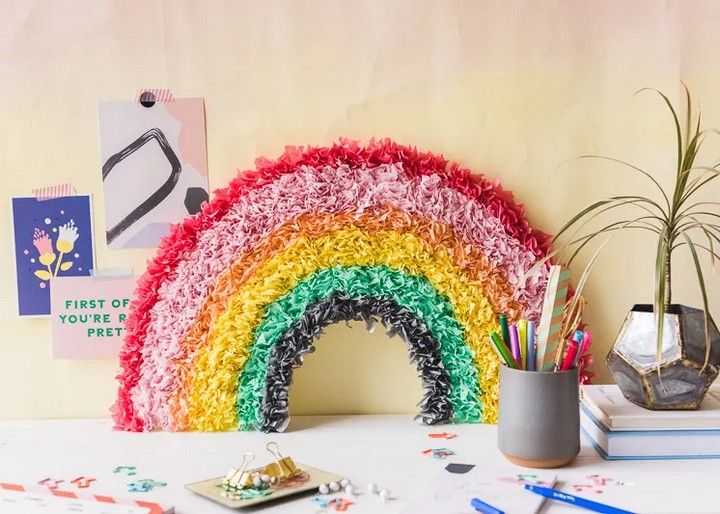
Make a colourful DIY tissue paper rainbow. Make rainbow tissue paper strips out of tissue paper. Arrange the strips in the following order: red, orange, yellow, green, blue, and purple. Glue or tape the strips together to make an arch shape on a piece of cardboard or paper. To add a splash of colour and delight to any place, hang or display the tissue paper rainbow. Tutorial
36. Snowflake Suncatcher Craft
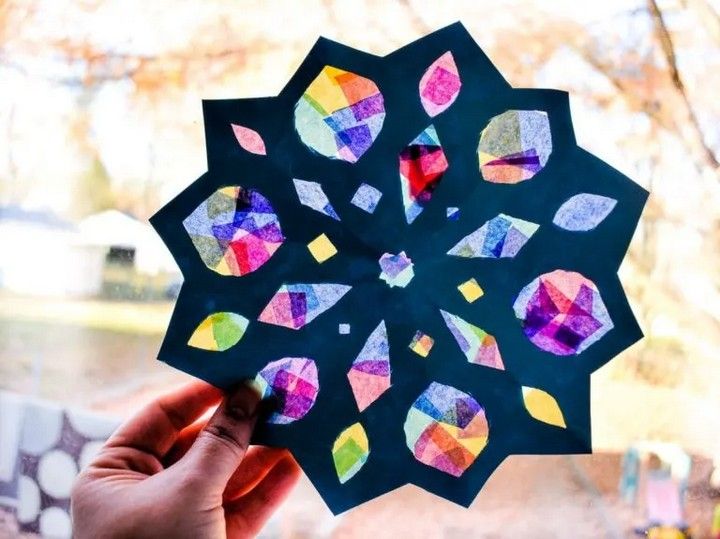
Make lovely snowflake suncatchers by using pre-made snowflake templates or cutting snowflake shapes from white or silver paper. For further durability, cover the snowflakes with transparent contact paper or laminate them. Make a hole at the top and hang it with a thread or ribbon. Hang them in windows or outside and let the sunshine flow through to create a hypnotic snowflake pattern in your room. Tutorial


