Originating from Japan, washi tape—a decorative masking tape—has become a favourite tool for crafters all over because of its adaptability, cost, and simplicity of use. There are 18 DIY Washi Tape Crafts that provides many opportunities to release your imagination regardless of your level of experience with do-it-yourself projects or just seeking to add a personal touch. This post will go over several easy yet powerful do-it-yourself projects you could quickly design using washi tape.
Decorating home goods to give them a fresh, new appearance is another enjoyable pastime. With washi tape patterns, transform outdated photo frames, floral pots, even furniture. Just wipe the surface, lay the tape in the desired design, and cut any extra. Washi tape also comes quite handy for labelling and organising home goods. Washi tape is your go-to for making decorations and favours whether you’re getting ready for a party or other occasion. As a temporary design, wrap tape over drink cups; alternatively, fold washi tape over strings to make unique banners and garlands. Using washi tape instead of conventional wrapping paper or decorations will also let you create original gift wraps and cards.
1. Washi Tape Flowers
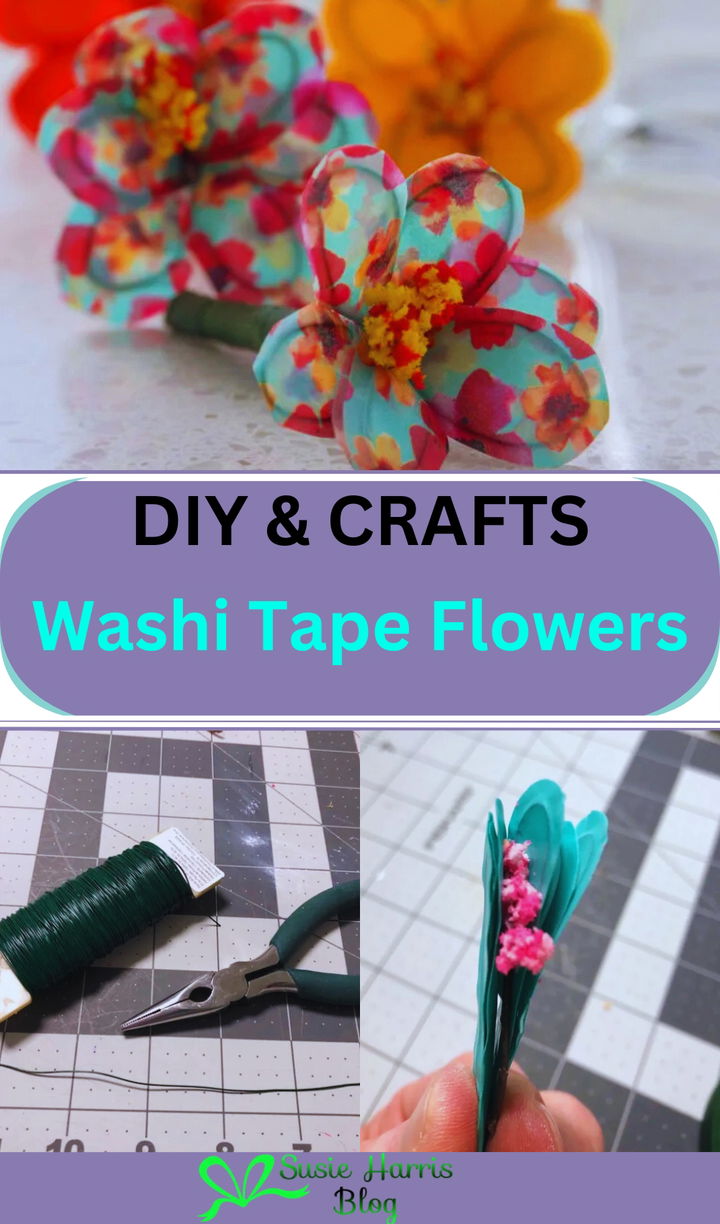
Making Washi tape flowers is a fun and simple do-it-yourself hobby that gives any project some vibrant accent. Form the flowers and leaves by first choosing many Washi tape colours and designs. For more impact, cut the tape into petal forms and stack them. Wrap a slender wire or a wooden skewer a strip of green Washi tape around to make the stem. Arange the petals around the stem and secure them with additional glue or tape. These little blossoms would be ideal for embellishing cards, presents, or even your office.
Supplies needed:
- Washi tape
- Wire
- Glue
- Wire cutter
2. Gallery Wall

Making a gallery wall with homemade washi tape crafts is a simple and enjoyable approach to accentuate your room. Choose from a range of washi tape designs that accentuate the décor of your space. Add a splash of colour and texture by drawing borders for your images or art prints with these tapes. As your style changes, this adaptable and reasonably priced method lets you endlessly customise and may be readily upgraded.
Supplies needed:
- Washi tape
- Scissors
- Glue
3. Dry Erase Board
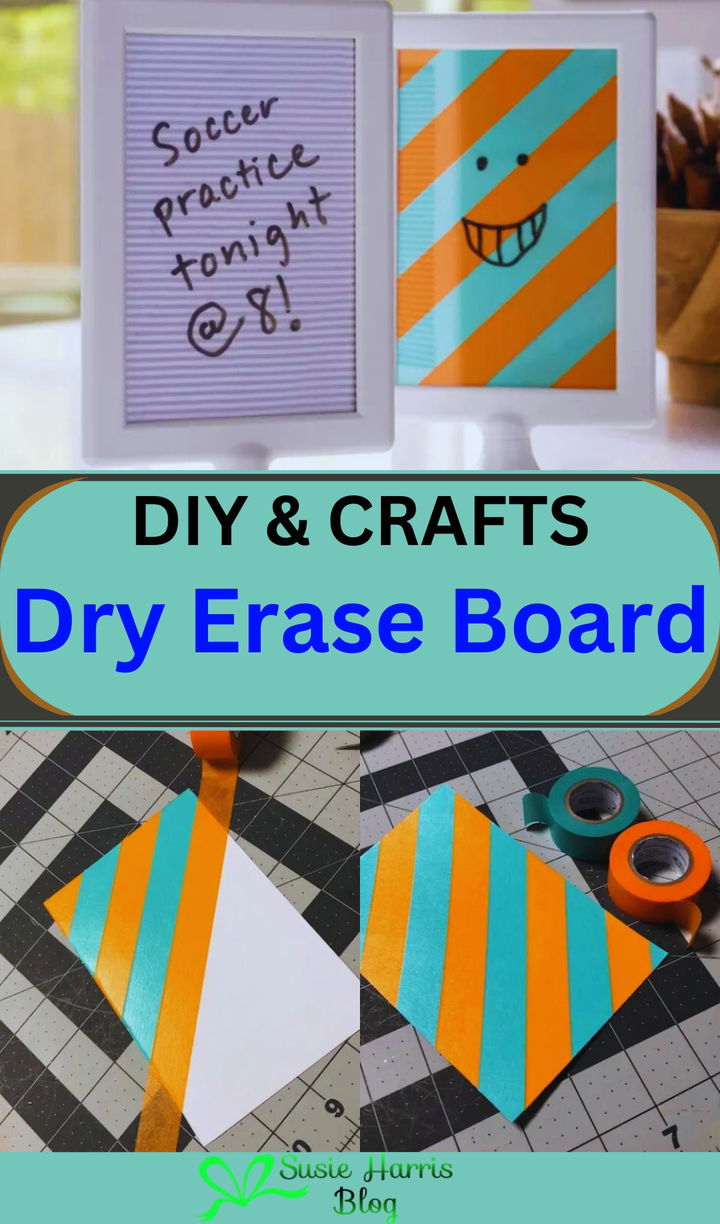
Transform your dry erase board into a vibrant masterpiece with a DIY washi tape craft project. Begin by selecting a diverse selection of washi tapes that are in harmony with the decor of your room. Directly on the board, employ these tapes to generate borders, grids, or creative patterns. It is also possible to create sections for to-do lists, notes, or a calendar layout. The simplicity of washi tape’s removal allows for the flexibility to alter designs as soon as inspiration strikes, ensuring that your dry erase board remains fresh and personalised without any residual.
Supplies needed:
- Washi tape of different colors
- Dry erase board
- Scissors
4. Washi Tape Cards
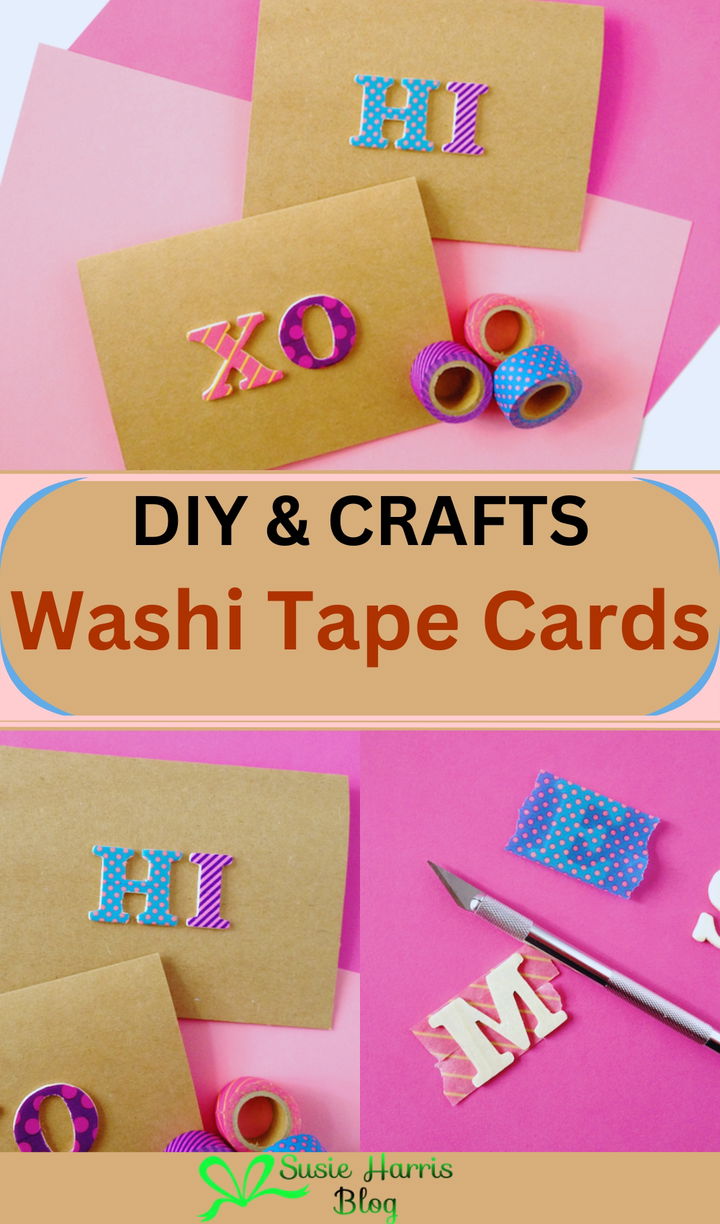
Making Washi tape cards is a fun and simple do-it-yourself project that gives every occasion a unique touch. These colourful and pattern-based ornamental tapes provide limitless inspiration. Starting with a blank card or paper, create a Washi tape card here. Select complimentary tapes, then arrange them in stripes, patterns, or even form shapes. To guarantee it adheres properly, press the tape firmly; cut any extra. Finish your individual and considerate card with a handwritten message or adornment.
You will need:
- Washi tape of different colors and design
- Pen or cutter
- Glue
5. Easter Eggs

Making Easter eggs with DIY washi tape crafts is an easy and entertaining approach to give your holiday decorations an idealistic touch. Choose first a range of vibrant and patterned washi tapes. Use craft eggs for a longer-lasting show. Experimenting with stripe, chevron, or even abstract designs, carefully wrap or stack strips of washi tape over the eggs. This artistic method guarantees a mess-free experience and produces exquisitely personalised Easter eggs to accentuate your holiday festivities.
Supplies needed:
- Washi tape
- Scissors
- Fake eggs
6. Washi Tape Lamp Shade
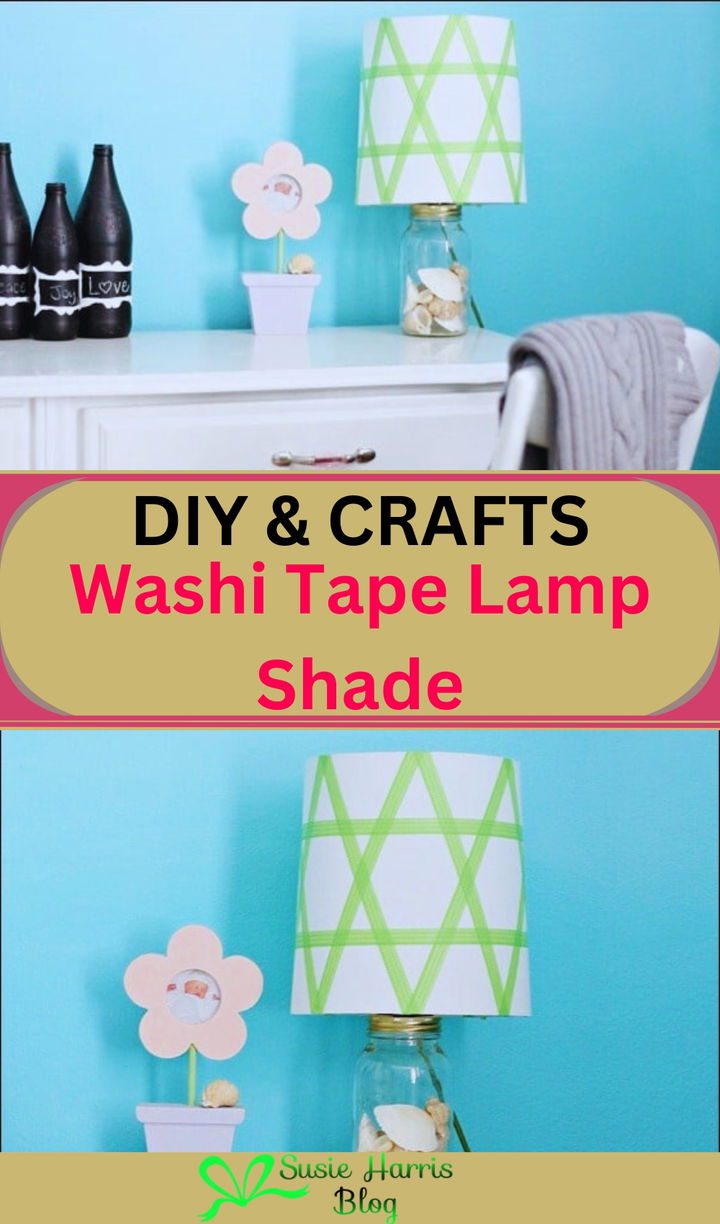
A simple do-it-yourself washi tape project can turn your lamp shade into a colourful work of art. Start by picking out a variety of washi tape patterns that go with the rest of the decor in the room. Make sure the lamp shade’s surface is clean so the tape sticks well. Carefully wrap the washi tape around the shade. Start at the top or bottom edge. Prints can be layered or mixed to make a unique look. This simple, low-cost project makes any room more interesting and beautiful with a splash of colour.
7. Pineapple Print
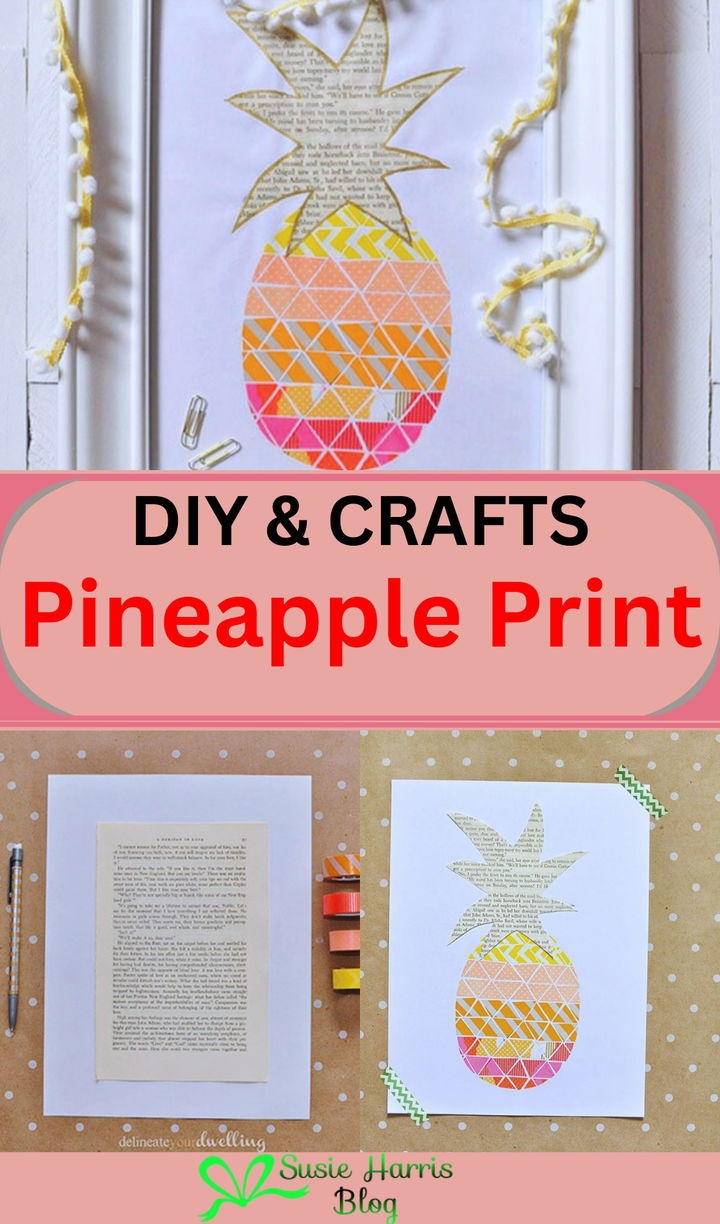
Washi tape is a versatile crafting material that can be employed to enhance the characteristics of commonplace products. One enjoyable DIY endeavour is the creation of pineapple print designs using washi tape. Begin by collecting a few rolls of washi tape in varying hues of yellow and green, as well as scissors and a plain notebook or picture frame.
Supplies needed:
- Roll of washi tape
- Plain notebook
- Scissors
- Picture frame
8. Christmas Card Tree
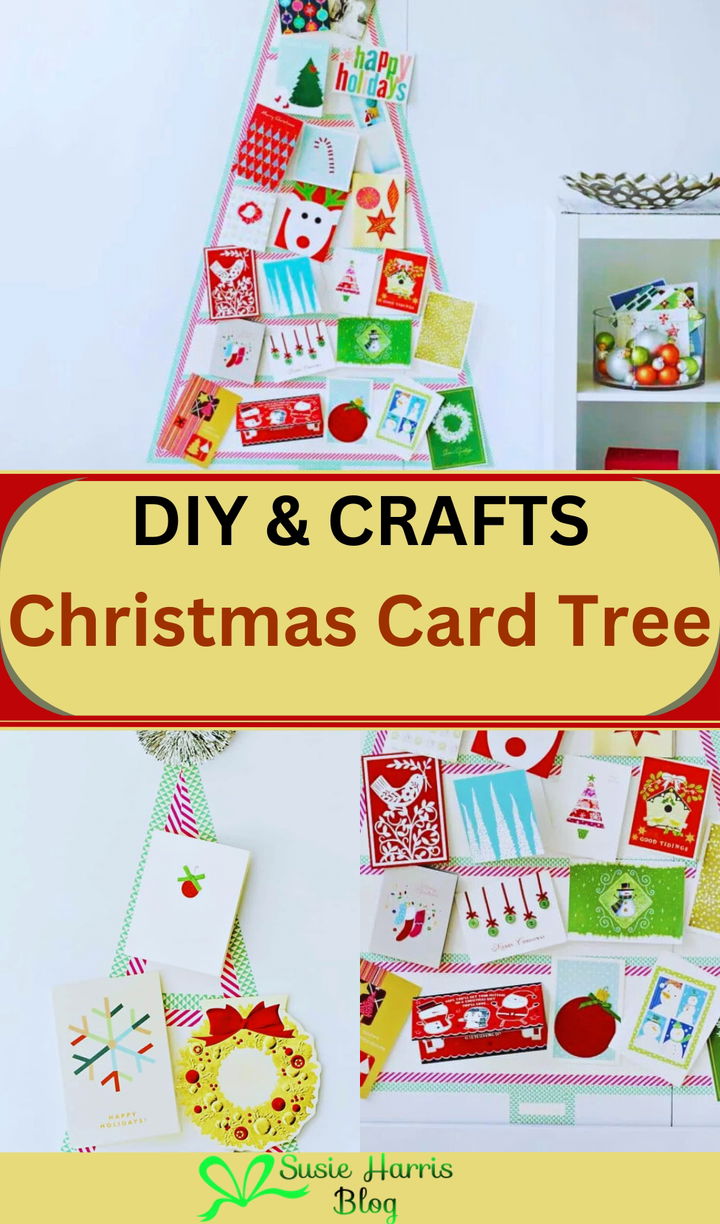
Using washi tape to make a homemade Christmas card tree is an adorable and creative way to show off your holiday wishes. Choose a wall or door to use as your background. Pick up a range of washi tapes with different patterns and colours to create a tree shape.
Supplies needed:
- Washi tape
- Scissors
- Card book
9. Photo Frame
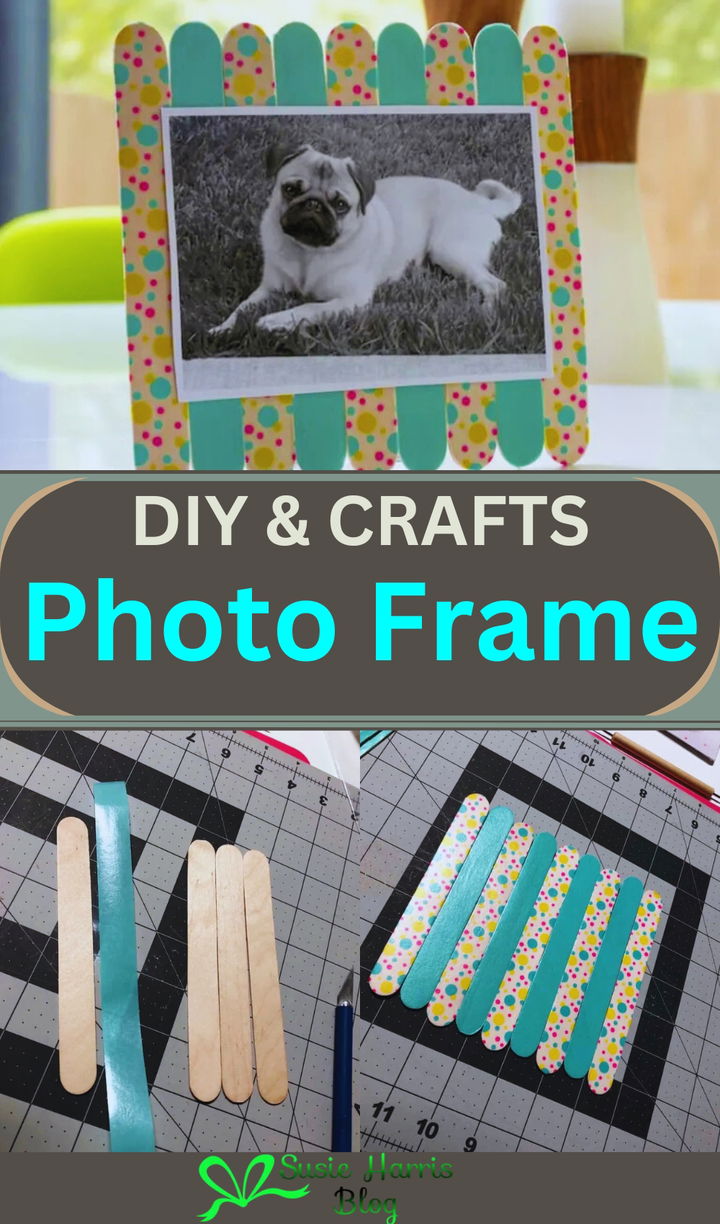
The use of washi tape to make a picture frame is a hobby that is not only simple but also enjoyable, and it can be used to add a personal touch to your home design. You can gift this beautiful frame to your friend, Mother, and Father or your love one. This amazing or colorful frame will add a touch of flare to your most treasured memories.
Supplies needed:
- Washi tape
- Wood strips
- Pen or cutter
- Scissors
10. Geometric Heart

It is a lovely do-it-yourself craft that adds a bit of elegance to any area. For example, you may create a geometric heart with washi tape. Lightly draw the shape of a heart on a piece of cardboard or canvas, and then split it into portions that are geometric in nature. After carefully applying the washi tape inside each part, be sure to line the borders so that the finished product is clean. When you are finished, remove any extra tape. You now own a bright and personalised piece of art that you can either display or give as a gift.
11. Temporary Wallpaper
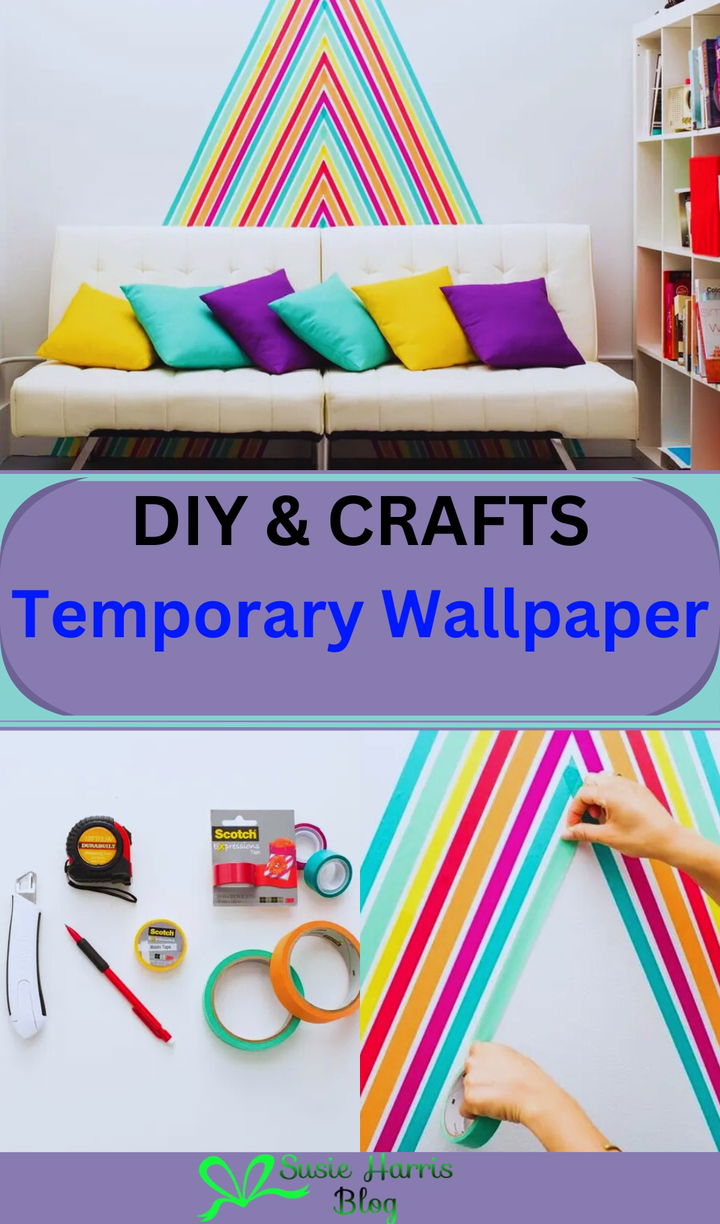
Makeover any room in your house with this easy and inexpensive DIY project: use washi tape as temporary wallpaper. If you want to give a space a one-of-a-kind look without committing to wallpaper, try this multipurpose crafting tape in a rainbow of colors and designs. Start with selecting any washi tape patterns you like, and then arrange them on a blank wall in a pattern of your choosing, whether it stripes, geometric shapes, or something else entirely. Anyone who wants to change their décor often but doesn’t want to deal with the headache of permanent adhesive will love this easy-to-remove alternative.
Supplies needed:
- Washi tape of different colors
- Measuring tape
- Cutter
- Scotch
- Pen
12. Wooden Bracelets
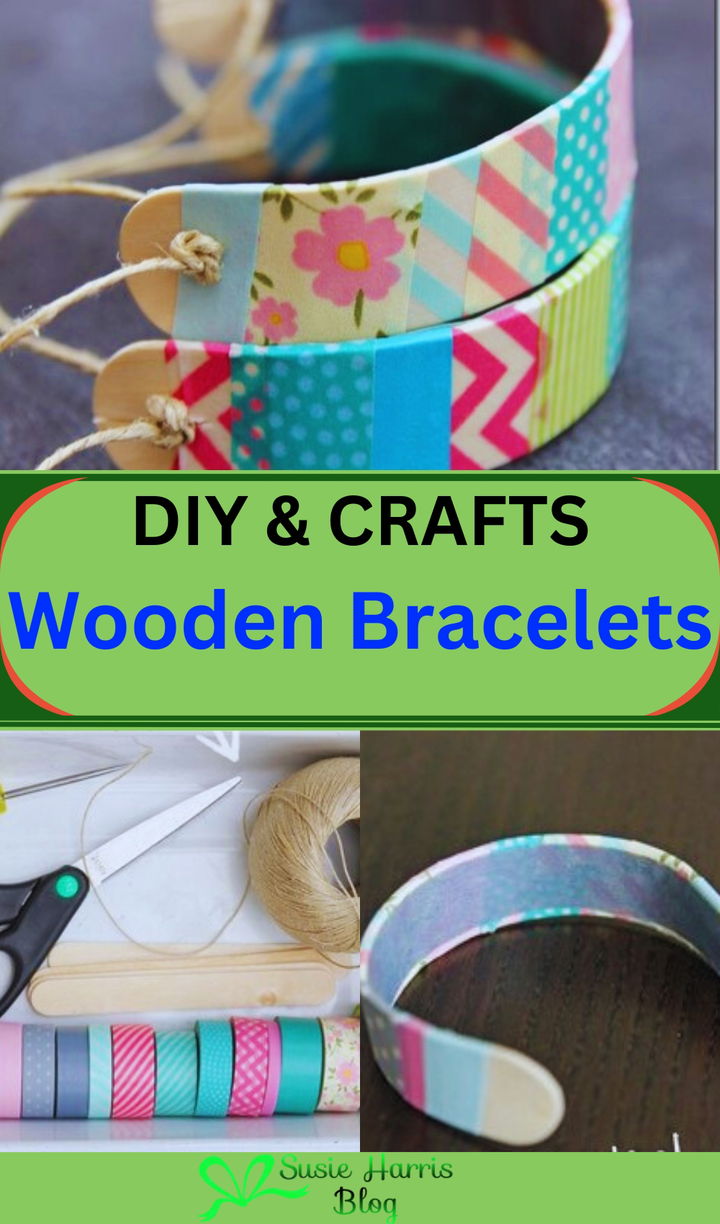
A fun and simple do-it-yourself craft project that gives your accessories a personal touch are making wooden bracelets with washi tape. Start with choosing simple wooden bangles, which would be the ideal canvas for your originality. Select from vivid patterns to subdued pastels a range of washi tape designs that complement your taste. Wrap the washi tape around the bracelet gently, then smooth it out to prevent creases or bubbles. Apply a clear sealer to finish and give your design polished appearance and protection. These bespoke bracelets would be fantastic presents or fashionable accent to any outfit.
You will need:
- Wood
- Washi tape
- String
- Scissors
13. Notebooks & Pencils
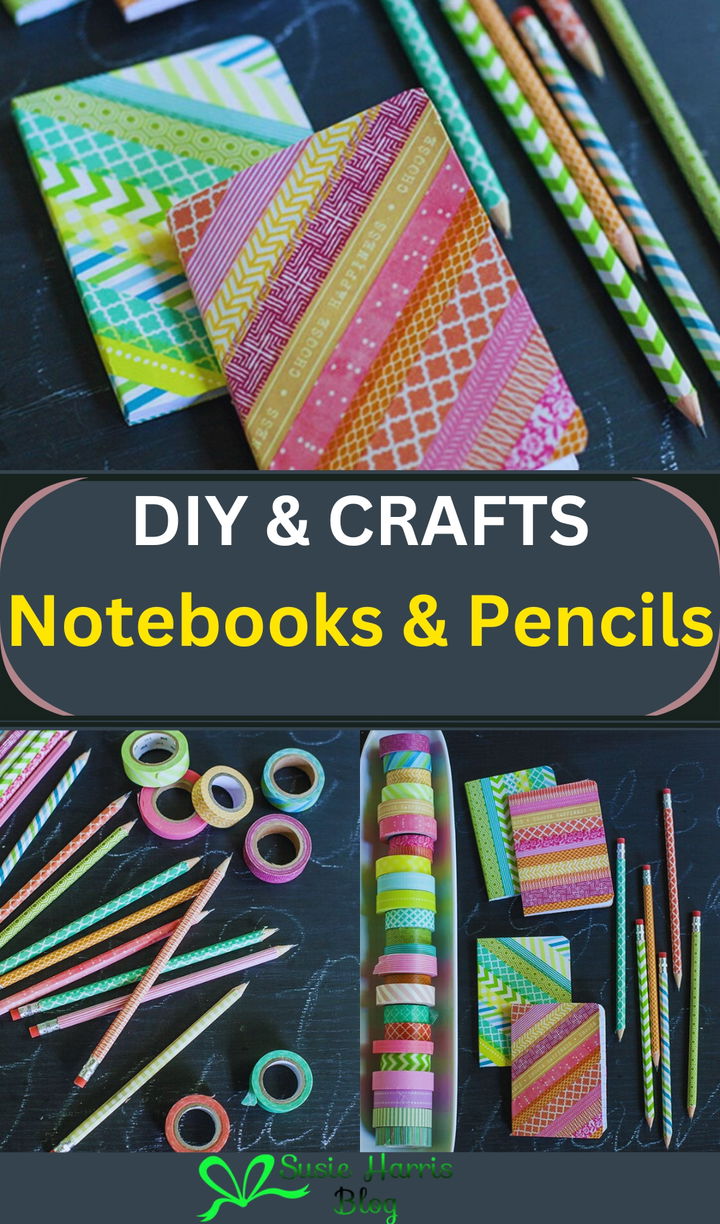
Transforming your notebooks and pencils with DIY washi tape crafts is a fun and creative project that adds a personal touch to your stationery. Start by selecting a variety of colorful washi tapes that reflect your style. For notebooks, use the tape to create decorative borders or unique patterns on the cover. You can also personalize pencils by wrapping them in washi tape, starting from the eraser end and working your way down. This simple yet effective craft not only enhances your supplies but also allows for endless customization.
Supplies needed:
- Pencils
- Notebook
- Washi tape
- Scissors
14. Luggage Tags
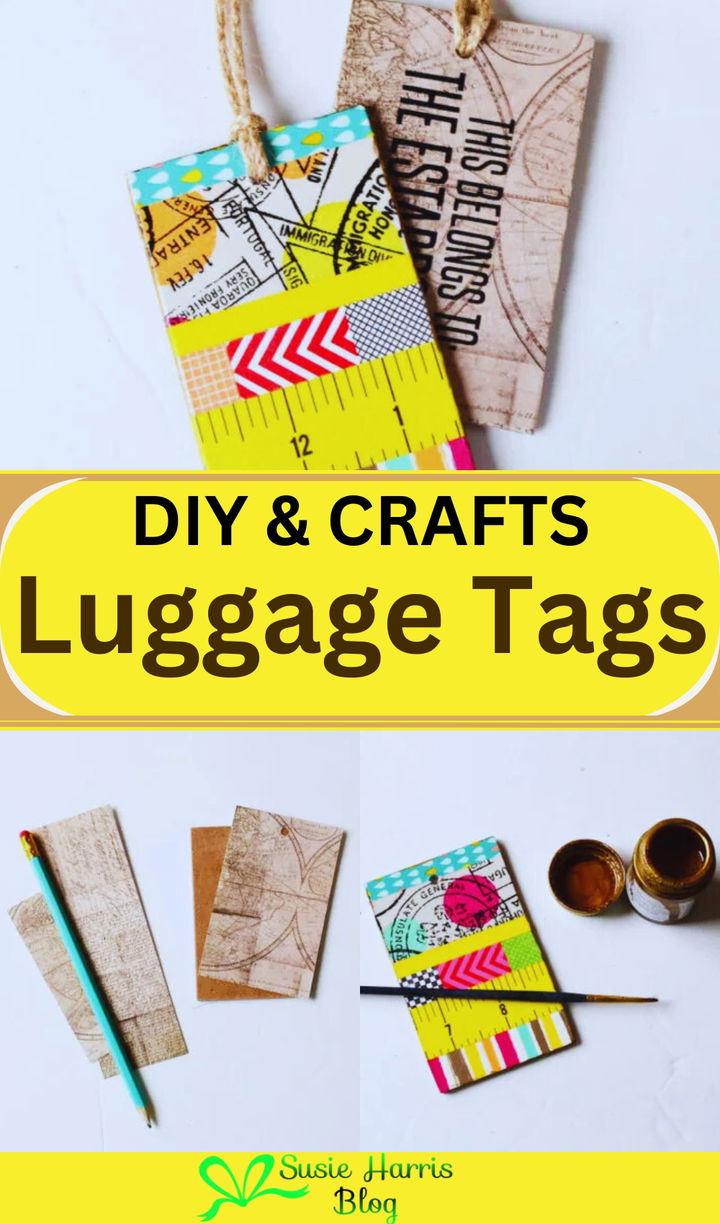
An easy and inexpensive way to add a unique touch to your travel accessories is to make your own baggage tags using washi tape. Use durable cardboard or a pre-cut tag form as a base, and then accessorize with a rainbow of washi tapes that express your unique style.
Supplies needed:
- Pencil
- Measuring tape
- Washi tape
- Scissors
15. Clothespin Wreath

Create your own distinctive accent for your home with this easy and interesting clothespin wreath fashioned using washi tape. Select a spectrum of vivid washi tapes to accentuate your selected theme. Evenly run the tape around every clothespin. Attaching the adorned clothespins to a wire frame in alternate orientations will help you to create a bigger wreath. Extra decorations, including ribbon or little ornaments, let you show even more your uniqueness. This simple DIY is suitable year-round and gives any area some uniqueness and flare.
Supplies needed:
- Washi tape
- Clothespin
- Scissors
16. Pretty Flower Pot
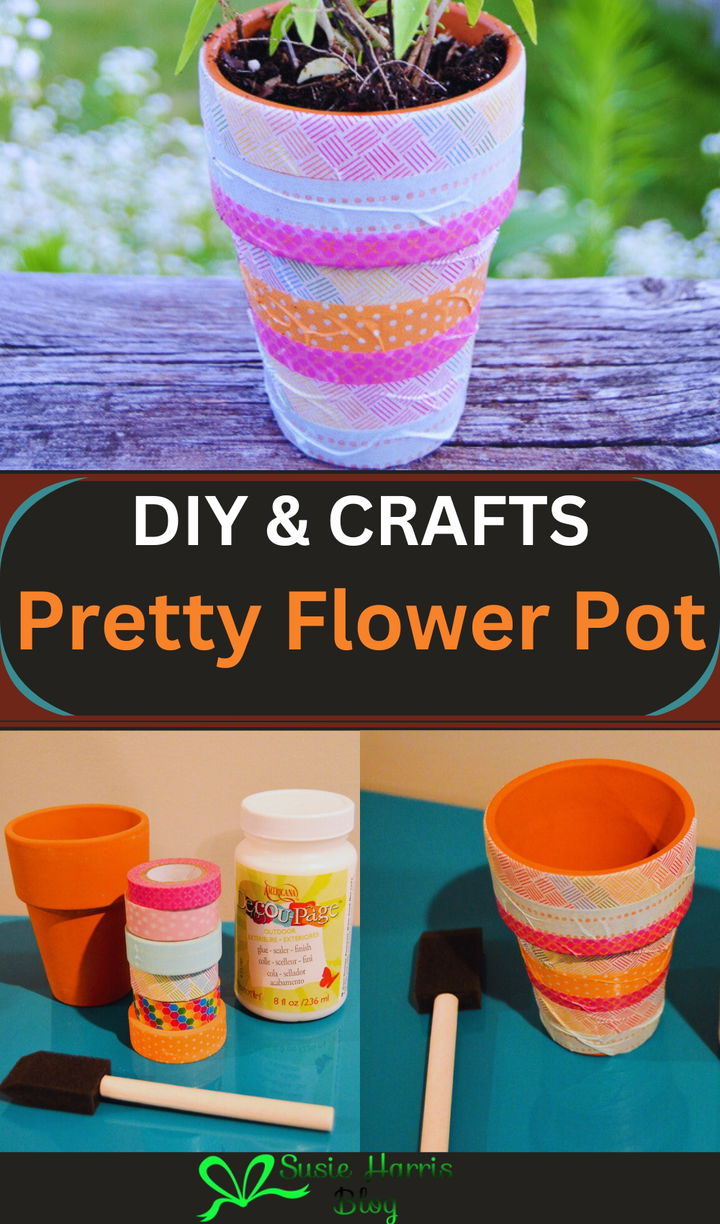
Making a beautiful flower pot with washi tape is a simple and enjoyable do-it-yourself project that livenes your house. Start with selecting a simple terracotta pot and your chosen washi tape designs. Empty the pot to ensure optimum tape adherence. Start at the base and, using the tape, circle the pot, flattening any bubbles as you go. For a quirky look, you may mix many designs; for a more united design, stick to one. Seal with a translucent varnish to lastingly protect your artwork.
Supplies needed:
- Washi tape
- Flower pot
- Spatula
- Glue
17. Basket Pizzazz

Basket Pizzazz shows a creative way to upgrade your regular baskets with do-it-yourself Washi tape crafts. From a selection of vivid, colorful Washi tapes that complement your personal style or décor, choose To create brilliant stripes or creative patterns, gently wrap the tape around the basket’s rim or handles. You may also cut forms—such as hearts or stars—from the tape to add extra flair. This simple yet creative DIY not only personalized your baskets but also made them beautiful accent objects perfect for any house.
You will need:
- Washi tape
- Scissors
- Plastic or wooden basket
18. Decorate Utensils

Using do-it-yourself washi tape crafts to transform your kitchen utensils is a creative and simple approach to give common objects some individuality and color. Start by choosing several washi tape patterns that accentuate your kitchen décor. Make sure the utensils are completely clean, free of residue and dry. Wrap the washi tape over handles gently to create original layers and designs. Over the tape, brush a clear sealer or Mod Podge for extra durability. This basic DIY not only customizes your cutlery but also brightens your cooking area.
Supplies needed:
- Washi tape
- Glue
- Utensils


